

Tutorials
MQ-2 Smoke & Gas Sensor with Arduino: Build a Kitchen Gas Alarm with a Buzzer
Aug
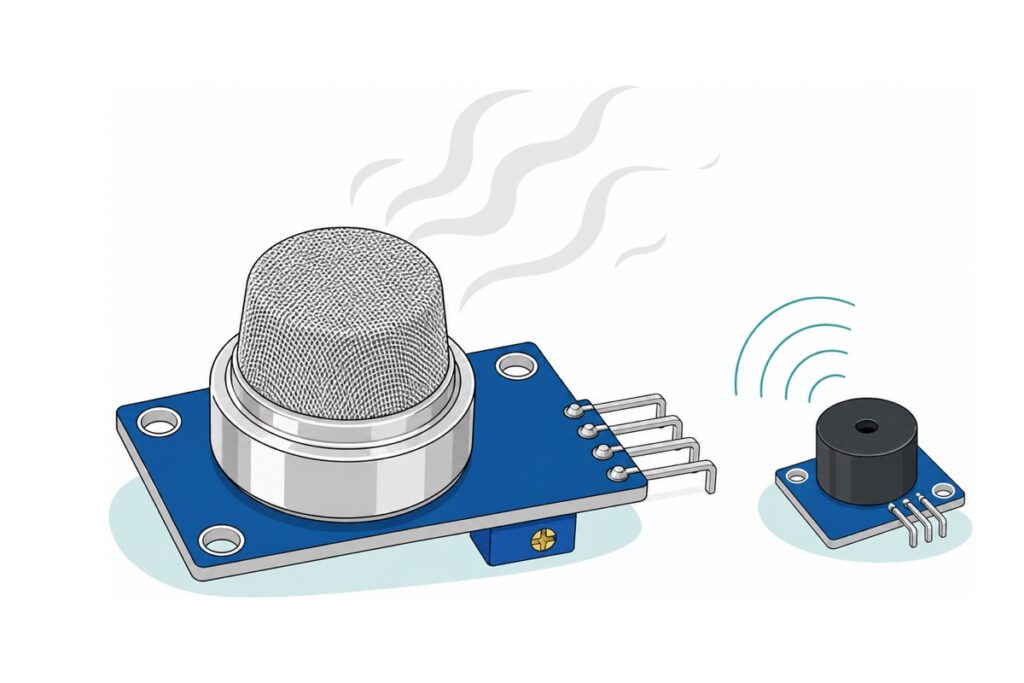
An MQ-2 module tells you the air around it has changed, quickly and cheaply — but it does not hand you a trustworthy ppm number. So build it honestly: warm the sensor, let the Arduino record what clean air reads, and alarm on any climb above that baseline. Early warning for a kitchen gas leak or a school project, not a certified detector.
What do you need to build an MQ-2 gas and smoke alarm?
The MQ-2 module needs three connections: 5 V, ground, and one analog wire into the Arduino. Everything else on the list exists to make those three physically possible without soldering.
Parts list — MQ-2 gas and smoke alarm with buzzer
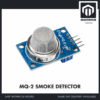 MQ Gas Sensor Module Digital Analog Dual Output Smoke CO LPG Methane Hydrogen Air Quality Detector - MQ-2 SMOKE DETECTOR
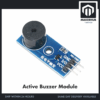 Buzzer Active Passive Buzzer 5V Electronic Sound Alarm Module Tone Piezo - Active Buzzer Module
 Arduino Compatible UNO R3 FT232 Development Board Arduino Compatible CH340 Alternative
 Data Cable Type-A Type-C MicroUSB Type-B 0.5m 1m 30cm 0.3m 100cm Data Transfer Upload Code - TYPE-A TO TYPE-B (1.0M)
 MB102 Breadboard 170 400 830 Holes Breadboard Donut Board Arduino Prototype Multi Color - BREADBOARD (400 HOLES)
 40pcs Dupont Wire 10cm 20cm 30cm for Breadboard DIY Experiment Jumper Wire Breadboard wire - DUPONT WIRE M-M 20CM
 40pcs Dupont Wire 10cm 20cm 30cm for Breadboard DIY Experiment Jumper Wire Breadboard wire - DUPONT WIRE M-F 20CM
Parts list
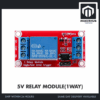 Relay Module 3.3V 5V 12V 1/2/4/8 Ways Optocoupler Trigger Relay Module 1 2 4 8 Channel Relay Module - 5V RELAY MODULE(1WAY)
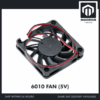 DC Cooling Fan 5V/12V Brushless Small Fan for 3D Printer DIY Projects Electronics Cooling - 6010 FAN (5V)
Add these to make an exhaust fan spin the moment the alarm fires. The relay is a switch, not a power source — the fan runs from its own 5 V supply, and the switched side stays low-voltage DC.
The MQ-2 module and the MH-FMD active buzzer both carry right-angle male pins, so the female ends of male-to-female jumpers grip them; those male ends land in the breadboard, whose rails split that single 5 V socket in two, and male-to-male jumpers run the rails back to the Uno. The Uno programs over full-size USB-B, so it needs the A-to-B cable.
How does an MQ-2 actually smell gas?
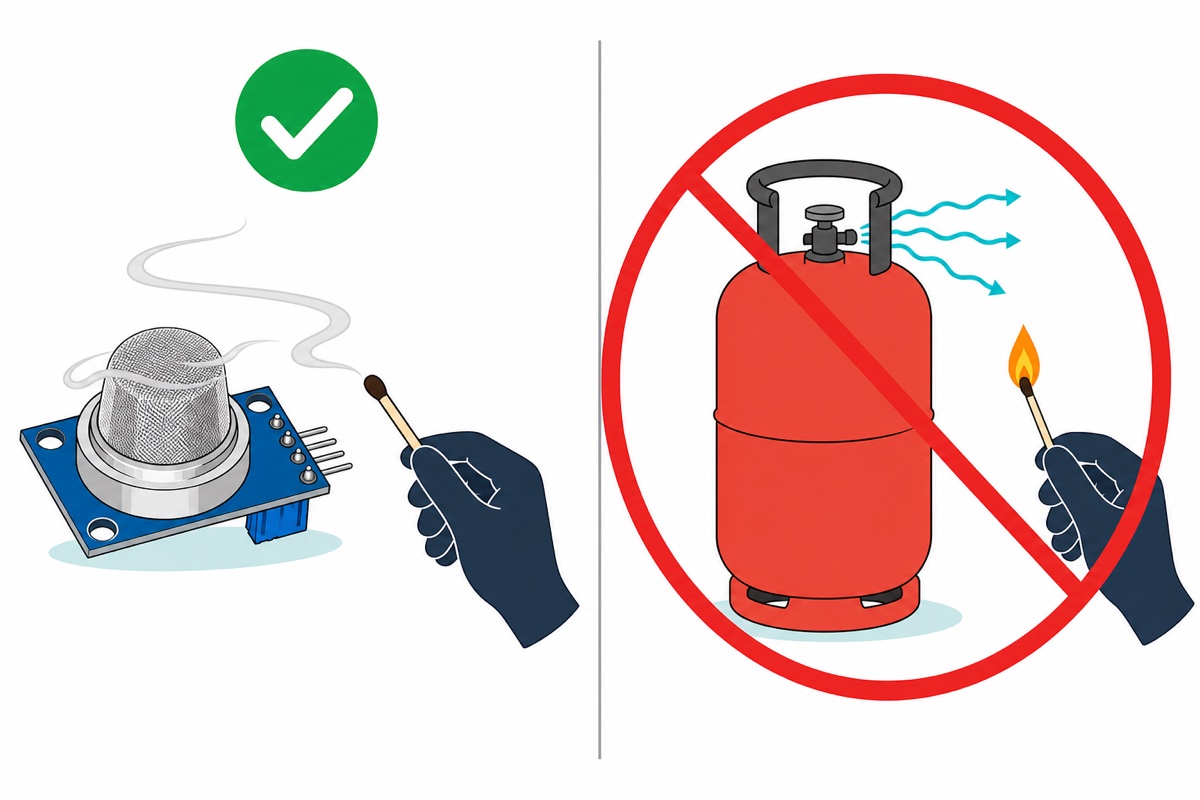
The MQ-2’s sensing element is a thin film of tin dioxide (SnO2) on a small ceramic tube with a nickel-chrome heater coil through it, per the Hanwei datasheet. The heater holds that film at a few hundred degrees, and at that temperature oxygen from the air clings to the surface and traps electrons out of the tin dioxide. Those trapped electrons leave a depleted layer current struggles to cross — a clean, hot sensor is a fairly high resistance.
Combustible gas breaks that arrangement. LPG, butane, methane, alcohol vapour and the unburnt hydrocarbons in smoke react with the stuck-on oxygen and free the electrons it held; the depleted layer shrinks, resistance falls, and the module’s fixed resistor turns that fall into a rising voltage on AO. Nothing in the chain is specific to one gas — which is why one element answers to LPG, smoke and alcohol alike, and why the family has siblings such as the MQ-135 air-quality sensor behind our haze monitor guide.
The silver mesh is stainless-steel anti-explosion gauze, stopping the glowing element from igniting the gas it is sniffing. Never remove it, and never bring a flame to it. Detecting fire itself rather than its smoke is an infrared job — see our flame-sensor alarm guide.
Why does an MQ-2 need to warm up before you believe it?
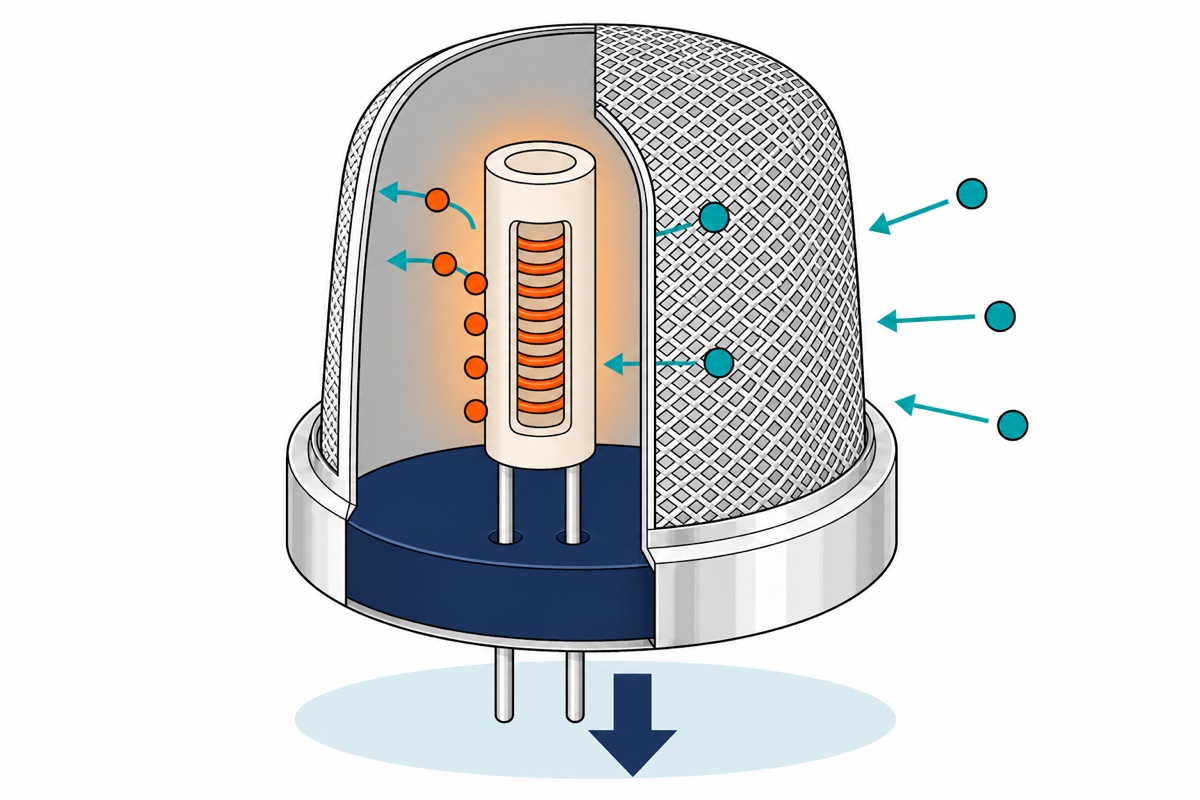
The MQ-2 reads high and drifts downward for the first minutes of every power-up, and that is chemistry, not a fault: the heater must bring the ceramic tube to working temperature before oxygen re-adsorbs onto the film and settles at the coverage that defines “clean air” for that sensor. The datasheet asks over 24 hours of preheat before its sensitivity figures apply — a burn-in a new sensor wants once; later power-ups want only minutes.
The sketch below waits three minutes, averages 64 samples into a baseline, and alarms on a percentage rise above that, so an aged sensor or a higher kitchen background moves baseline and threshold together.
How do you wire the MQ-2 and buzzer to an Uno?
The MQ-2 board prints its four pin labels on the underside beside the header, since the silver can hides that end from above. Read them before powering anything — swapping VCC and GND puts 5 V backwards across the heater. To tell the outputs apart, AO drifts by tens of counts as you breathe near the mesh; DO sits at a hard 5 V or 0 V.
| From | To | Why |
|---|---|---|
| Uno 5V and GND | Breadboard + and − rails | The rails split one 5 V socket between two modules |
| MQ-2 VCC / GND | + rail / − rail | The heater is the load here, not an Arduino pin |
| MQ-2 AO | Uno A0 | A voltage that rises smoothly with gas — what the sketch reads |
| MQ-2 DO | Leave unconnected | A comparator output that goes LOW past the blue trimmer’s threshold. The trimmer moves that threshold only — it cannot change the analog value at all |
| Buzzer VCC / GND | + rail / − rail | The module carries its own driver transistor |
| Buzzer I/O | Uno D8 | Sounds when this pin is pulled LOW — the board’s 低电平触发 marking |
The MQ-2’s heater is specified as 33 Ω, so at 5 V it pulls 5 ÷ 33 ≈ 150 mA and burns 5 × 0.15 ≈ 0.75 W — the datasheet’s “less than 800 mW” from the other direction. With the Uno and buzzer the alarm sits near a quarter of an amp, inside the 500 mA resettable polyfuse on the USB input. That heater runs continuously, which is why the module feels warm and why this is not a battery project.
It helps to watch smoke actually being waved at the mesh:
What does the MQ-2 gas sensor Arduino code actually do?
The MQ-2 needs no library — AO is a plain analog voltage and the buzzer is one digital pin. Set the board to Arduino Uno, upload, then open the Serial Monitor at 9600 baud straight away — opening the port pulses the Uno’s reset line through a capacitor, so the three-minute warm-up restarts silently from the top every time you open that window. It compiles to 3,970 bytes, about 12% of the Uno’s flash, and the relay lines are harmless without the optional parts.
// MQ-2 kitchen gas + smoke alarm: warm up, learn clean air, alarm on the RISE.
// No library needed - AO is a plain analog voltage and the buzzer is one digital pin.

const uint8_t MQ2_AO_PIN  = A0;  // MQ-2 analog output, 0-5 V into the 10-bit ADC
const uint8_t BUZZER_PIN  = 8;   // MH-FMD active buzzer I/O - it sounds on LOW
const uint8_t RELAY_PIN   = 7;   // optional relay IN, jumper set to H = fires on HIGH

const unsigned long WARMUP_MS   = 180000UL;  // 3 min: let the heater and the film settle
const uint8_t       BASE_SAMPLE = 64;        // averaged readings that become the baseline
const unsigned long BASE_GAP_MS = 60UL;      // spacing between those readings (~4 s total)

const float    RISE_FACTOR  = 1.35;  // alarm at 35% above the clean-air baseline
const float    CLEAR_FACTOR = 1.15;  // release only after it falls back near baseline
const uint16_t RISE_FLOOR   = 40;    // ...but never less than 40 ADC counts of rise

const unsigned long ALARM_MIN_MS = 5000UL;  // shortest alarm, so a puff cannot chatter
const unsigned long BEEP_MS      = 250UL;   // on/off period of the pulsing tone

uint16_t baseline    = 0;
uint16_t alarmLevel  = 0;
uint16_t clearLevel  = 0;

bool alarmOn = false;
unsigned long alarmStartedMs = 0;
unsigned long beepToggledMs  = 0;
bool beepAudible = false;

// The buzzer module is a LOW-level trigger: pulling I/O LOW is what makes it sound.
void buzzer(bool on) {
  digitalWrite(BUZZER_PIN, on ? LOW : HIGH);
}

uint16_t averageOfSamples() {
  uint32_t total = 0;
  for (uint8_t i = 0; i < BASE_SAMPLE; i++) {
    total += analogRead(MQ2_AO_PIN);
    delay(BASE_GAP_MS);
  }
  return (uint16_t)(total / BASE_SAMPLE);
}

void setup() {
  Serial.begin(9600);

  // Set the idle level BEFORE each pin becomes an output. A fresh output pin starts
  // LOW, and LOW is exactly what makes this buzzer scream - so write HIGH first.
  // The relay, with its jumper on H, is the other way round: LOW is its off state.
  digitalWrite(BUZZER_PIN, HIGH);
  pinMode(BUZZER_PIN, OUTPUT);
  digitalWrite(RELAY_PIN, LOW);
  pinMode(RELAY_PIN, OUTPUT);

  Serial.println(F("Warming up - keep the air around the sensor clean."));
  while (millis() < WARMUP_MS) {
    delay(1000);
  }

  baseline   = averageOfSamples();
  uint16_t rise = (uint16_t)(baseline * (RISE_FACTOR - 1.0));
  if (rise < RISE_FLOOR) {
    rise = RISE_FLOOR;
  }
  alarmLevel = baseline + rise;
  clearLevel = baseline + (uint16_t)(rise * (CLEAR_FACTOR - 1.0) / (RISE_FACTOR - 1.0));

  Serial.print(F("Clean-air baseline: "));
  Serial.print(baseline);
  Serial.print(F("  alarm at: "));
  Serial.print(alarmLevel);
  Serial.print(F("  clears below: "));
  Serial.println(clearLevel);
}

void loop() {
  unsigned long now = millis();
  uint16_t reading = analogRead(MQ2_AO_PIN);

  if (!alarmOn && reading >= alarmLevel) {
    alarmOn = true;
    alarmStartedMs = now;
    beepToggledMs = now;
    beepAudible = true;
    buzzer(true);
    digitalWrite(RELAY_PIN, HIGH);
    Serial.print(F("ALARM - reading "));
    Serial.println(reading);
  }

  if (alarmOn) {
    // Pulse the tone so it reads as an alarm rather than a stuck buzzer.
    if (now - beepToggledMs >= BEEP_MS) {
      beepToggledMs = now;
      beepAudible = !beepAudible;
      buzzer(beepAudible);
    }

    // Only allowed to stop once BOTH are true: the air is clean again AND the
    // alarm has run its minimum time. Unsigned subtraction survives rollover.
    if (reading < clearLevel && (now - alarmStartedMs >= ALARM_MIN_MS)) {
      alarmOn = false;
      buzzer(false);
      digitalWrite(RELAY_PIN, LOW);
      Serial.println(F("Clear"));
    }
  }

  // One line a second so you can watch the numbers move while you test.
  static unsigned long lastLogMs = 0;
  if (now - lastLogMs >= 1000UL) {
    lastLogMs = now;
    Serial.print(F("raw "));
    Serial.print(reading);
    Serial.print(F("  baseline "));
    Serial.println(baseline);
  }

  delay(20);
}
One line is easy to skip: digitalWrite() runs before pinMode(OUTPUT). Writing the level first sets the same port-register bit while the pin is still an input, so it is already correct the instant the pin becomes an output.
The baseline the sketch prints decides whether the alarm can fire at all. The ADC stops at 1023 counts, so a baseline above roughly 758 pushes the 35% trip point past full scale and no amount of smoke can reach it — a sensor still burning in, so leave it powered rather than edit the sketch. Sensitivity lives there too: not on the blue trimmer, which only moves the DO threshold, but in RISE_FACTOR and RISE_FLOOR. Raise them if kitchen steam trips it, lower them if a smoking match does not.
What ppm can you actually trust from this?
The MQ-2’s datasheet gives sensitivity as a ratio, not a reading: Rs/R0 — and R0 is not the reading in clean air. The datasheet defines it as that individual sensor’s resistance at 1000 ppm of hydrogen in clean air, so even the denominator of the ratio has to be measured in a known gas. Every published curve — LPG, methane, propane, smoke, alcohol, hydrogen, carbon monoxide — is drawn against that ratio with a different slope, so turning a reading into ppm needs three things at once: R0 measured on your own unit, the right curve, and knowledge of which gas is present. A raw ADC count gives none of them.
That is why this build alarms on a rise. The datasheet’s detecting scope — 200–5000 ppm for LPG and propane, 5000–20000 ppm for methane — is what the element responds to in a lab, not what an uncalibrated board reports. As early warning it earns its place, noticing a hissing cylinder long before anyone in the next room does. As life safety it is no substitute for a certified detector.
How do you test it safely?
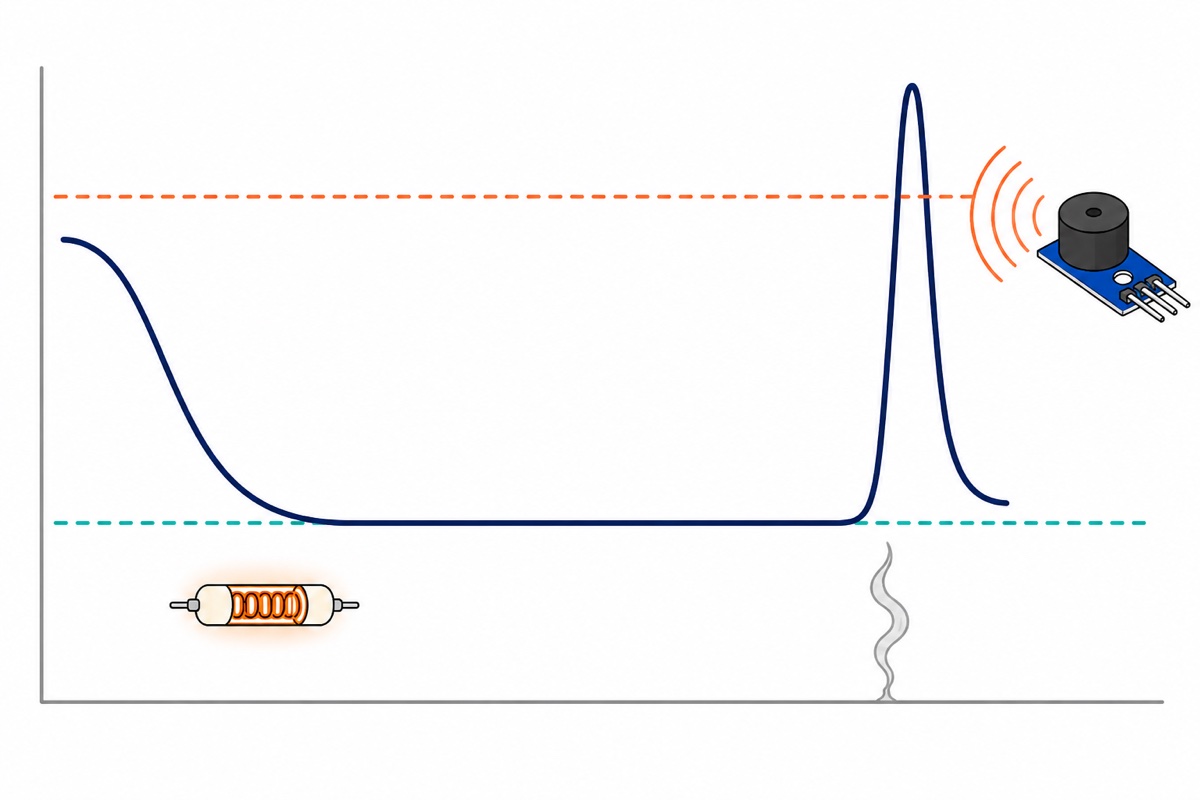
The MQ-2 responds well to a blown-out match or a stick of incense held half a metre away: the smoke’s unburnt hydrocarbons are exactly what the film reacts to, and the raw number jumps within a second or two. That is the safe test, and the right one for a school demonstration.
Do not open a gas cylinder or a stove tap to make it “detect properly” — that builds an ignition risk in the room to test an alarm, and a lit match near escaping LPG is the accident the alarm exists to prevent. A butane lighter held unlit with its valve pressed for a second, in a ventilated room, is as close to LPG as this project needs.
Where should the sensor go in a Malaysian kitchen?
An Arduino gas leak detector only helps where the gas actually arrives, and LPG and smoke go opposite ways. The propane and butane in a cylinder are heavier than air, so a leak sinks and pools at floor level; smoke is hot and rises. One MQ-2 cannot cover both, so for the cylinder under a Malaysian kitchen counter mount it low — about 30 cm off the floor and within a metre of the regulator. Keep it clear of the steam, too: the MQ-2 answers to alcohol vapour and to the humidity in a boiling pot’s plume, so above the stove or beside a rice cooker it will cry wolf, and cooking-oil aerosol slowly coats the element and dulls it.
How do you make an exhaust fan spin when the alarm fires?
The 5 V relay module turns one Arduino pin into a switch big enough for a fan. Control arrives on a three-way screw terminal marked IN, DC−, DC+ — no header, so a jumper’s bare male end clamps into the screw. DC+ and DC− come off the breadboard rails, IN goes to D7, and the coil draws about 71 mA — its 0.36 W, 70 Ω coil at 5 V.
Set the small L/H trigger jumper to H before uploading. It decides whether the coil energises on a HIGH or a LOW at IN, and the sketch drives the pin HIGH to fire. Left on L, the fan runs from power-up and stops when the alarm sounds — backwards, and a classic “faulty relay” ticket that is really a two-pin jumper.
The switched side is a dry contact: COM and NO are a bare pair of metal fingers with no electrical path back to the Arduino, so the 60 mm 5 V fan takes its own 5 V supply. Supply positive into COM, NO out to the fan’s red wire, fan black straight back to the supply’s negative — the relay only interrupts one leg of that loop. Run the fan off the Uno’s rails instead and heater, coil and fan crowd that 500 mA polyfuse, before the fan’s starting surge.
That white two-pin plug does not need cutting: a male jumper end pushes into each of its sockets, so the fan stays reusable, and the two other ends clamp into the load-side screws. Keep that side low-voltage DC — the contacts carry mains ratings, but mains switching belongs in our relay safety guide.
Common mistakes we see from real customers
Buying the sensor by itself. A customer asked us “can you show me the product that i need to buy from your shop to make this smart smoke detectore” — and the module alone cannot be that detector: it has male pins where a jumper needs a socket. The parts list above is the whole answer.
Judging the sensor in its first minute. The number at power-up is the heater settling, not gas. The sketch learns its baseline once, at power-up, and never again — so if you move the alarm to another room, or the sensor has aged, press reset and let it learn the air it is in.
Wiring the buzzer as an active-high device. It screams from boot and never stops, which reads as a faulty module. HIGH is silence — the same trap as the buzzer in our PIR motion light guide.
Assuming there is no code, or that the match must be lit. Another customer asked, in Bahasa Melayu, “perlu coding lagi? dan saya perlukan mancis kah untuk buat prototype ini berkesan?” — yes, there is code, and it is the sketch above; and the match works best after you blow it out.
FAQ
How long must an MQ-2 warm up?
A few minutes at every power-up, plus a first burn-in of 24 hours or more on a new sensor if you want the datasheet’s sensitivity figures. This sketch waits three minutes and then measures its own baseline, so it stays honest either way.
Can an MQ-2 give me a ppm number?
Not without calibrating that sensor in a known concentration of a known gas — the datasheet asks for 1000 ppm of LPG or iso-butane. Its curves are ratios against R0, a reference resistance defined at 1000 ppm of hydrogen, and every gas has a different slope, so a raw reading is a relative signal.
Can I use an MQ-2 as my home smoke or gas detector?
No. Use it as an early-warning or teaching build and keep a certified LPG or smoke detector for life safety. An uncalibrated module has no tested alarm threshold and no fault supervision.
Will an MQ-2 work on an ESP32 or a Raspberry Pi Pico?
The heater still needs 5 V, and AO can swing close to 5 V — above the 3.3 V analog input limit on both. Divide AO down with two resistors first, or keep the sensor on an Uno. A display is the other common next step, as in our LCD1602 guide.
Last updated August 2026. Stuck? Chat with us on WhatsApp.
