

Tutorials
Mini Solar Panel: Which 5V or 6V One for Your Project?
Sep
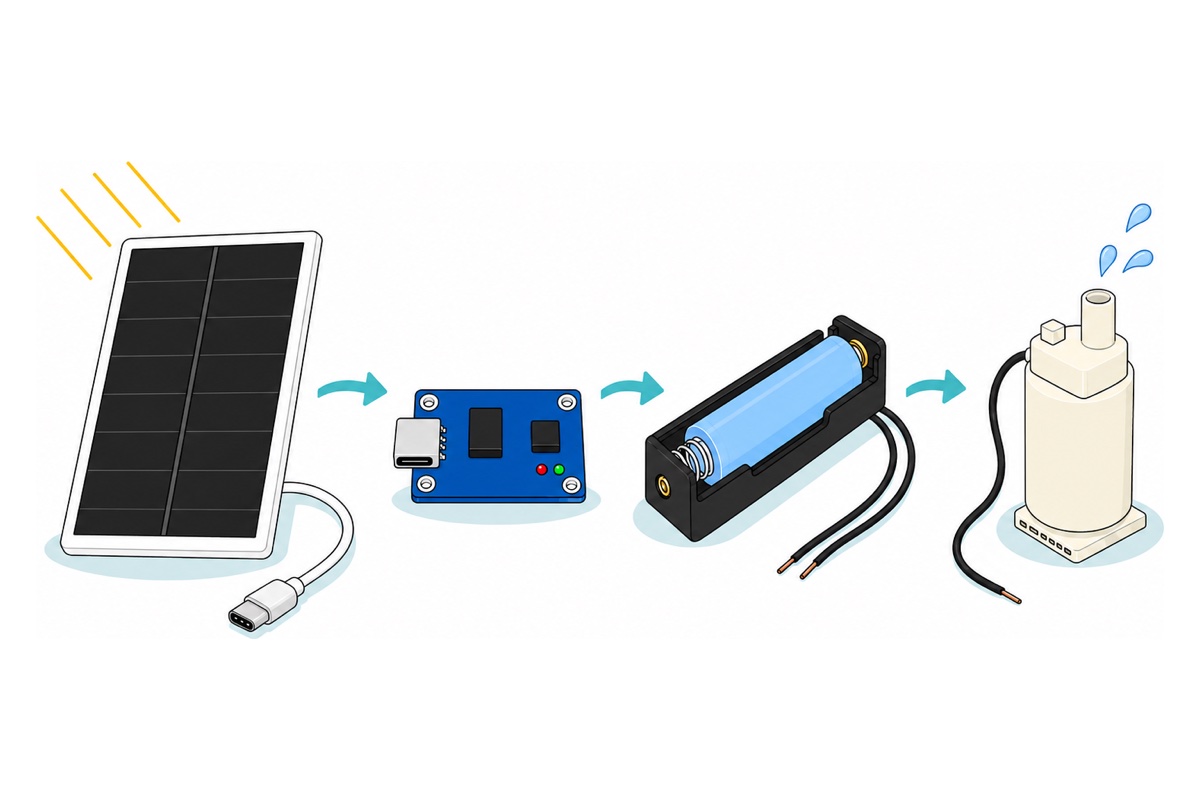
Choose a mini solar panel by the current (mA) it can actually give, not by the voltage number on its label — panels marked 5V and 6V both suit a TP4056 charging module, because that module’s input window is 4.0–8.0 V. A small panel is not a power supply; it is a slow charger. The right chain is always panel → charging module → 18650 cell → load. If you want one quick answer: the 5.5V 1.1W epoxy panel is the smallest panel that can genuinely charge an 18650 cell, and the 5V 6W mono panel is the one that finishes that job in a day.
What does “5V” or “6V” mean on a mini solar panel?
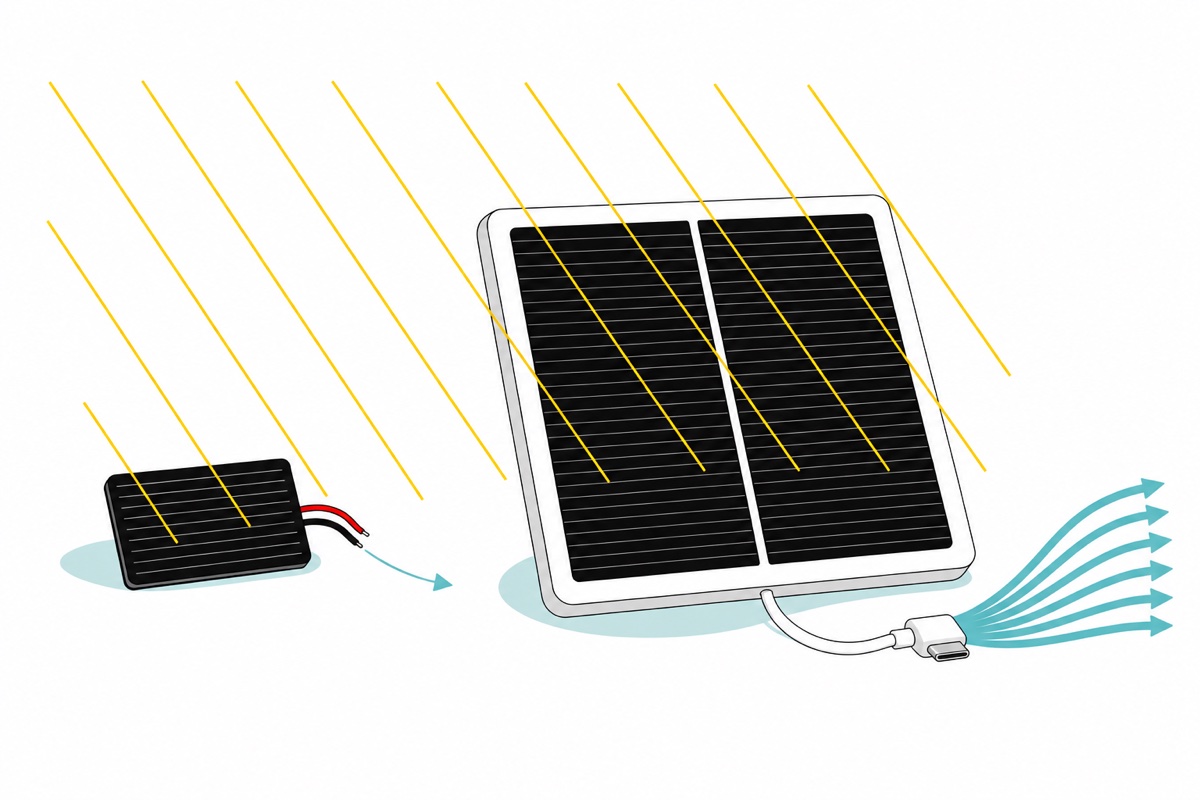
The voltage on a solar panel’s label is its voltage at maximum power (Vmp) — the voltage the panel holds while it is working under full sun, not the voltage you will read on a multimeter. A single silicon cell gives about 0.5 V under load but 0.6 V open-circuit, so a panel of eleven cells in series is labelled 5.5 V and reads close to 7 V with nothing connected to it. A reading higher than the label is normal, not a sign of a faulty panel.
The number you have to match is not the panel’s label but the charging module’s input window. The TP4056 Type-C charging module accepts 4.0 V to 8.0 V on its VCC pin, with 5 V as the typical value, and that 8 V is also its absolute maximum (NanJing Top Power datasheet). That is why both 5V and 6V panels are safe: a 6V panel stops at a Voc of roughly 7.2 V, still under 8 V. A 12V 20W panel opens at 14.4 V, far past that limit — that is a different size class, and the place to start is our 18650 charging board and holder guide.
The bottom of that window is what decides between 5V and 6V. The TP4056 stops charging when its input voltage falls too close to the cell voltage, and a panel’s Vmp does fall as the panel gets hot: silicon loses about 0.3% of its voltage for every degree Celsius, and a panel baking under Malaysian sun easily reaches 55–65 °C, which is 30–40 °C above the 25 °C test temperature. A hot 5V panel sits around 4.5 V — still enough, but with little to spare; a 6V panel drops to about 5.4 V and is still comfortable. That is why the 6V option exists: not because the cell wants 6 V, but because that panel carries spare voltage for heat and for long thin wire to throw away.
Some panels never even reach that lower limit. The 3V 0.3W mini panel opens at only about 3.6 V — below the TP4056’s own UVLO threshold, which wakes up only when VCC rises past roughly 3.7 V, and which must stay at least 100 mV above the cell voltage before any charging current flows. That panel will never charge an 18650 cell, even through a TP4056. Its real job is turning a DC solar motor directly.
The quickest way to check a panel yourself is to measure Voc and short-circuit current with a multimeter:
If there is an Arduino Uno on your desk, the sketch below reads the panel every second. It needs two equal-value resistors as a voltage divider, because a 6V panel’s Voc (~7.2 V) is more than the 5 V an Uno analogue pin can take; a 2:1 divider brings it down to ~3.6 V. Do not use this divider on a 12V panel: 14.4 V halved is still 7.2 V, and that kills the pin.
// Read a mini solar panel's voltage with an Arduino Uno - for SMALL panels ONLY (Voc under 10 V).
// Voltage divider, two resistors of the SAME VALUE (10k + 10k, for example):
//   Panel (+) -> R1 -> midpoint -> R2 -> Panel (-)
//   Midpoint -> A0           Panel (-) -> Uno GND
// The 2:1 ratio means A0 only ever sees half the panel voltage,
// so panels up to ~10 V stay safe for the Uno's 5 V pin.

const uint8_t PIN_PANEL = A0;
const float   VREF      = 5.0;   // the Uno's 5 V rail is the ADC reference
const float   NISBAH    = 2.0;   // ratio (R1 + R2) / R2 = (10k + 10k) / 10k

void setup() {
  Serial.begin(9600);
  Serial.println(F("Panel voltage (V). Cover the panel with your hand - watch it drop."));
}

void loop() {
  uint16_t mentah  = analogRead(PIN_PANEL);      // 0..1023
  float    vAdc    = (mentah * VREF) / 1023.0;   // voltage at pin A0
  float    vPanel  = vAdc * NISBAH;              // the panel's real voltage

  Serial.print(vPanel, 2);
  Serial.println(F(" V"));
  delay(1000);
}
That sketch shows only half the story. Cover the panel with your hand and the voltage reading does fall, but it falls far more slowly than the current, so voltage alone never tells you how much power is left. For the other half, measure the short-circuit current: turn the multimeter dial to a current range, move the red probe to the 10 A jack, and touch both probes to the panel’s two wires for a few seconds in the sun. That reading is Isc, usually 5–10% above the panel’s rated current. Shorting a solar panel like this is safe because a panel is a current-limited source — it cannot give more than the light allows. Never do the same thing to a lithium cell, which can push tens of amps and start a fire. Take that reading once at bright midday and once under cloud, and you have seen for yourself the number that decides your project.
Pick one — this is a menu, not a set
 3V/5V Solar Panel Mini Solar Panel 100mA 0.3W 5V 0.23W 5.5V 1.1W - 5V 0.23W SOLAR PANEL
 3V/5V Solar Panel Mini Solar Panel 100mA 0.3W 5V 0.23W 5.5V 1.1W - 5.5V 1.1W SOLAR PANEL
 2W 5V Mini Solar Panel Module DIY Power Bank Charger Small Solar Cell for Arduino Projects Electronics Learning
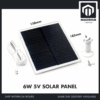 Monocrystalline Cells Solar Panel 5V 6V 3W 6W 10W 15W Mono Solar Energy - 6W 5V SOLAR PANEL
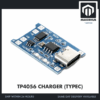 TP4056 18650 Battery Charger Module Lithium Ion Battery Li-ion Battery Charger Type C Micro USB - TP4056 CHARGER (TYPEC)
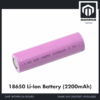 3.7V 18650 Battery Rechargeable Li-Ion Battery 1200mAh 2200mAh 3200mAh Flat Top - 18650 Li-Ion Battery (2200mAh)
The four panel rows in this list are alternatives, not a shopping list: take ONE, then add the charging module and the cell under it. The mini epoxy panels share a single product page and the white-framed mono panels share another, so after clicking through, pick the option that matches the table row below — 5.5V 1.1W, or 5V 6W, for example — from the dropdown on that page.
Optional extras
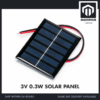 3V/5V Solar Panel Mini Solar Panel 100mA 0.3W 5V 0.23W 5.5V 1.1W - 3V 0.3W SOLAR PANEL
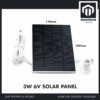 Monocrystalline Cells Solar Panel 5V 6V 3W 6W 10W 15W Mono Solar Energy - 3W 6V SOLAR PANEL
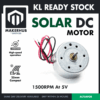 DC Solar Motor DC 1.5V 3V 3.3V 5V Mini Round DC Motor For Arduino IOT Solar Project
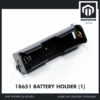 18650 Battery Holder 1/2/3/4 Slot 3.7V Battery Cell Housing Battery Case Battery Casing - 18650 BATTERY HOLDER (1)
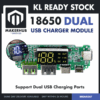 18650 Battery Charger Boost Module Dual USD Output Charging Module 5V with Charging Protection
 Mini Water Pump Submersible DC 3V-5V - 5V WATER PUMP
The 3V panel for turning a solar motor directly with no battery, the 6V mono panel for when the panel will bake in the sun or sit far from the charging module and you want spare voltage, a cell holder, a dual-USB boost board that charges the cell and puts out 5 V on two USB-A sockets (cell and holder separate), and a 5V water pump as the load.
How many mA does a small solar panel really give?
A solar panel’s rated current is its wattage divided by its voltage, and that is the whole calculation: a 2W 5V panel gives 2 ÷ 5 = 0.4 A, meaning 400 mA at bright midday. A 1.1W 5.5V panel gives 200 mA. A 0.23W 5V panel gives 46 mA — enough to light one LED, not enough for anything else.
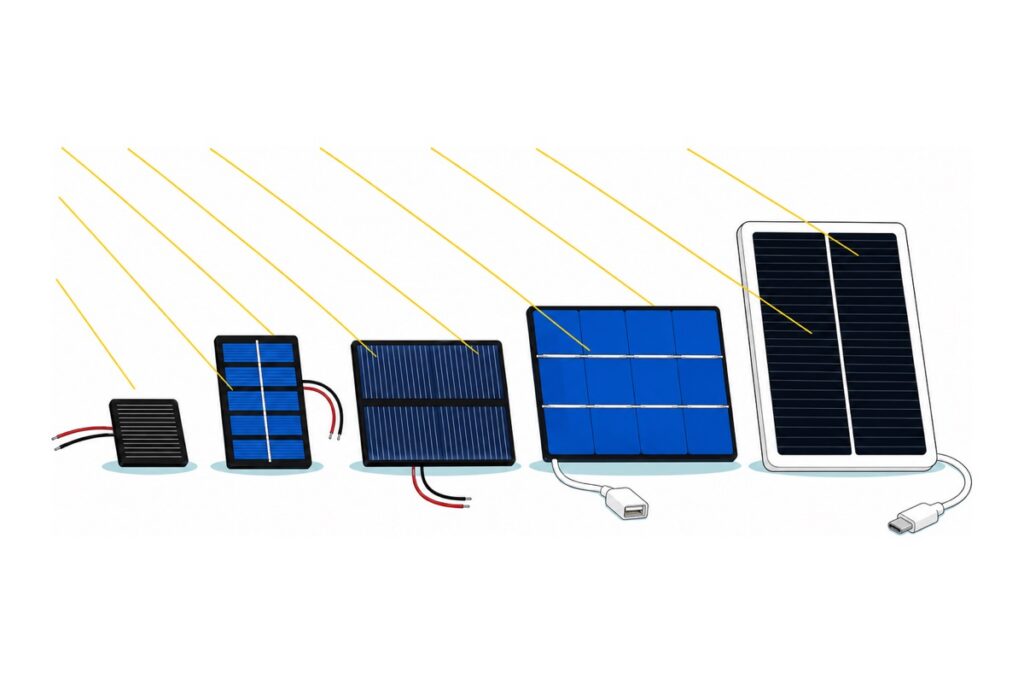
Physical size, meanwhile, is not a question of price but of physics. Bright midday sunlight carries roughly 1000 W per square metre, and silicon panels convert between 10% and 23% of it. A 53×30 mm panel catches 15.9 cm², which is 1.59 W of incoming light, and puts out 0.23 W — 14%. You buy mA with surface area, not with money. Across our whole range, efficiency moves only between about 13 mW and 20 mW per cm² — less than a factor of two — while area moves more than tenfold from the smallest wafer to the largest panel. So the extra money on a white-framed monocrystalline panel buys the frame, the wall bracket, a cable that already ends in a plug and the ability to live outdoors — not a jump in current. A bare epoxy wafer has no mounting holes and its wire joints are exposed, so its place is on a windowsill or indoors; the current still comes from size.
| Panel | Label | mA at full sun | Size | Wire end | Suits |
|---|---|---|---|---|---|
| 3V mini epoxy | 3V 0.3W | 100 mA | 65×48 mm | Bare red/black wires | Solar motor, school demo — cannot charge an 18650 |
| 5V mini epoxy | 5V 0.23W | 46 mA | 53×30 mm | Bare red/black wires | One LED, solar cell experiments |
| 5.5V mini epoxy | 5.5V 1.1W | 200 mA | 110×80 mm | Bare red/black wires | Slowly charging one 18650 through a TP4056 |
| 2W panel with USB | 5V 2W | 400 mA | 150×85 mm | Female USB-A socket | Charging through a USB cable you already own, no soldering |
| 3W mono | 6V 3W | 500 mA | 116×169 mm | Male USB-C plug | The 6V option, straight into the TP4056’s USB-C socket |
| 6W mono | 5V 6W | 1200 mA | 158×185 mm | Male USB-C plug | Outdoor projects that must fill up every day |
Larger sizes exist — 10W 5V at 231×185 mm and 15W 5V — following the same area pattern. Look at the wire-end column too, because that is the decision people forget to make: epoxy panels come out with bare wires that must be soldered to the pair of input pads beside the TP4056’s USB-C socket, marked + and −, not the OUT+/OUT− pads on the other edge, while the white-framed mono panels end in a male USB-C plug that goes straight into that module’s female USB-C socket with no soldering at all.
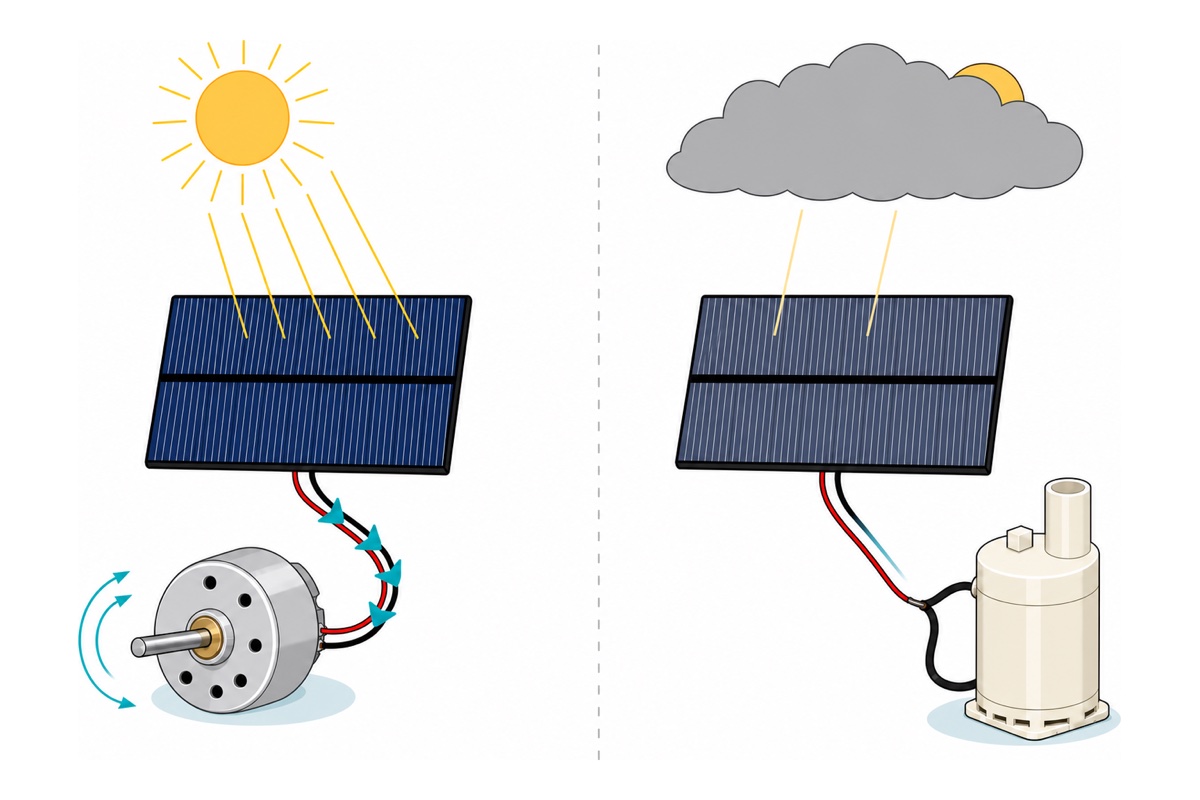
Then the clouds arrive. A solar panel behaves like a current source: cut the light in half and the current halves, but the voltage barely moves until the light is genuinely dark. There are two parts to why — current is directly proportional to the number of photons landing on the cell, while voltage is set by the semiconductor junction inside that cell and moves only logarithmically with light. A thick overcast sky can drop the light to 10–20% of bright midday — so your 400 mA panel gives 40–80 mA, while your multimeter still reads almost full voltage. That is the trap: the voltage looks healthy long after the current has gone.
Why can’t a 2W panel run an Arduino or a water pump directly?
Four different customers asked a version of this question in a single day. One wrote “Hi boss, I need for a small DIY project 1. Solar panel 2. DC motor. Can recommend which ah. It’s for a homemade waterpump using the DIY bottle cap water pump so very simple”, and another, for a school assignment, “Saya nak solder solar panel, bateri dan dc water pump kepada chi Ini utk assignment”. The answer is the same for both.
An Arduino Uno draws about 45 mA, so a 2W panel giving 400 mA looks like an eight-fold surplus. The problem is not the average, it is stability. When a load asks for more current than the light allows, the panel’s voltage does not sag gently — it collapses toward zero, because the panel’s I-V curve dives almost vertically the moment the load pulls past its maximum power point. One cloud passes, the 5 V rail falls below the ATmega328P’s brown-out threshold, and the board resets in the middle of the loop — not a slow project, but a project that reboots all day.
There is a second problem before that one. No pin on the Uno takes a mini panel gracefully. The onboard voltage regulator needs about 7 V on the VIN pin or the barrel jack before it can produce a stable 5 V, so a 5V or 6V panel gives it too little. Connecting the panel straight to the 5V pin instead bypasses that regulator completely, and when the board draws little current a 6V panel’s voltage climbs toward 7.2 V — past the 6 V the ATmega328P chip will accept on its supply rail. A cell charged by the panel and then boosted to 5 V gives the board a calm rail all day.
A water pump is stricter still. The 5V submersible pump runs at 100–200 mA, but that is the current after it is spinning. At the instant power arrives the rotor is still stationary, so there is no back-EMF, and only the coil’s resistance limits the current — a startup surge several times the running current. A 200 mA panel cannot supply it, the voltage collapses, the rotor does not turn, and because it does not turn it never generates the back-EMF that would have brought that current back down. You hear a hum, not water. That is why a panel has to be matched to a load’s startup current, not its running current — and for a pump, that startup current is exactly what no mini panel can give.
The DC solar motor is the exception: its startup current is very low, so it really does spin straight from a bare mini panel. That is why a 3V panel with a solar motor is valid for a school demo, but a 3V panel with a water pump is not.
There is one more step that is easy to miss in a school pump project. An 18650 cell sits between 3.0 V and 4.2 V while the pump is rated 5 V, so a cell wired straight to it gives a weak jet that gets weaker as the cell drains. A pump chain needs a boost board between cell and pump; if your load happens to be USB-plugged, like a WiFi dongle, the dual-USB 18650 boost module charges the cell and puts out 5 V on its USB-A sockets on one board — you connect the cell and its holder to that board yourself.
The right chain for a mini solar panel project
One customer asked: “solar panel yang 5V 10W ada siap battery dan female USB tak? ke saya kena DIY juga? Saya nak guna utk Wifi Dongle”. The 2W 5V panel with USB does have a female USB-A socket at the end of its white lead, but that socket is the panel’s output, not a power bank — there is no cell inside it, and it goes dark the moment the sun does. To get charging, a battery and a USB socket in one circuit, the dual-USB 18650 boost module is the honest answer — with one condition that must be said out loud: that 65×25 mm board carries no cell on it. You connect your own 18650 cell to it, through a holder, and the board then charges the cell and puts out 5 V on two female USB-A sockets even at midnight.
| Chain | Its job | If you skip it |
|---|---|---|
| Solar panel | Turns light into DC current — plenty at midday, little under cloud | No energy comes in at all |
| TP4056 charging module | Limits charging current and ends the charge at a cell voltage of 4.2 V | The cell overcharges — it can swell and catch fire |
| 18650 cell + holder | Stores daytime energy so it can be used at any hour | The load dies every time a cloud passes |
| Boost / buck (if needed) | Lifts the cell’s 3.7 V to the 5 V most modules want | A 5V load runs weakly or does not start at all |
| Load | Pump, motor, board, dongle | — |
Panel size is decided by the cell, not by the load. The TP4056 is a linear charger, so nearly all of the input current flows into the cell — a 200 mA panel puts in about 200 mAh per hour while the sun is good. After midday cloud is taken into account, budget three to four useful light hours a day, meaning 600–800 mAh. A 2200 mAh cell needs almost three days on that panel. A 6W panel, on the other hand, can offer more than the module will take: the TP4056’s charging current is set by the PROG resistor on the board, not by the panel, so it is capped at whatever that resistor sets — 1 A on a typical module — even when the panel can manage 1200 mA. The real benefit of a bigger panel is not a higher ceiling but more hours at that ceiling: it already reaches full current on a dim morning and stays there through thin cloud, while a 200 mA panel has halved by the time the first cloud crosses. That is the number that picks your panel.
The wiring itself and the night-time energy arithmetic live in our guide to charging an 18650 from a solar panel; charging module safety in the TP4056 guide, cell chemistry in the lithium battery types guide, converters in the buck and boost guide, and the full pump build in automatic plant watering.
Common mistakes we see from real customers
Paying before asking. One customer messaged “I want to cancel the solar panel because i accidentally bought the wrong one”, then “ordered the wrong own is what i meant”. Neither number on a panel’s label is the number that decides whether your project runs. Ask first how many mA your load needs.
Hunting for a voltage-and-wattage combination that does not exist. One asked “Nak tanya , ada tak solar mini 6v 5w”. In our monocrystalline range the 6V option is 3W and the 6W option is 5V — so the real question is: 6 V, or the current? If the destination is a TP4056, take the 5V 6W: the module accepts both voltages, and the 6W gives more than twice the current.
Assuming a panel arrives as a complete set. “beli dc ni dpt skali dengan solar panel tak” and “Bos..solar paner yg ada battery xde stok ke” — two questions with one root: the panel, the charging module and the cell are three separate items. The lists above are laid out as a menu so it is clear what has to be bought together.
Wiring a panel straight to a lithium cell with no charging module. A 5V panel that opens at 6 V will keep pushing voltage into an 18650 cell past its 4.2 V limit, because nothing in that circuit knows when to stop. An overcharged lithium cell can swell, leak and catch fire. The charging module is not an accessory in this chain — it is the only thing that ends the charge. And the question that always follows: no, you do not need to add a blocking diode to the panel. The TP4056 itself stops current flowing back from the cell into the panel when the sun goes, so the panel does not turn into a load at night.
FAQ
5V or 6V solar panel — which one for a TP4056 charging module?
Both suit it. The TP4056 accepts 4.0–8.0 V on its VCC pin with 5 V as the typical value, and a 6V panel only opens to about 7.2 V — still under the 8 V absolute maximum. Choose by current instead: a 6V 3W panel gives 500 mA, a 5V 6W panel gives 1200 mA. A 12V panel opens at 14.4 V and cannot be connected directly.
How many mA does a small solar panel really give?
Watts divided by volts gives the rated current at full sun — a 2W 5V panel means 400 mA. Thick cloud can drop the light to 10–20%, so the same panel gives 40–80 mA. The voltage barely moves, so your multimeter still looks healthy long after the current has gone.
Can a 2W solar panel run an Arduino directly?
Not stably. An Uno draws about 45 mA, so the average looks like plenty, but when the light drops the panel voltage collapses rather than sagging — the board resets every time a cloud passes. Connect the panel to a charging module and an 18650 cell, and run the board from the cell.
Which mini solar panel can run a 5V water pump?
No mini panel can be relied on to run a pump directly. The pump runs at 100–200 mA but needs a surge several times that at the instant it starts, because a stationary rotor has not yet generated any back-EMF. Use the panel to charge an 18650 cell through a TP4056 and run the pump from the cell, which can deliver that surge.
Why does my multimeter read 7 V on a panel labelled 5.5V?
That is the correct reading. The panel’s label is its voltage at maximum power, the voltage while it is loaded under full sun. With no load, every silicon cell rises from about 0.5 V to 0.6 V, so the panel reads roughly 20% higher. Your panel is not faulty.
Last updated September 2026. Stuck? Chat with us on WhatsApp.
