

Tutorials
HC-05 Bluetooth: Control Arduino From Your Phone (Android)
May
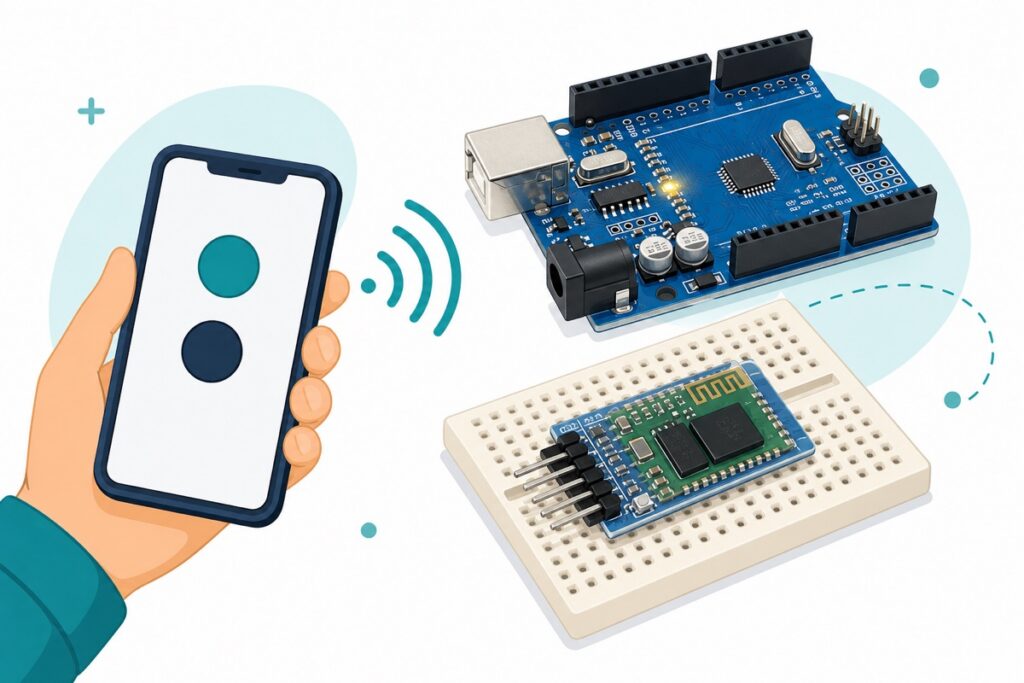
Yes — the HC-05 lets any Android phone control an Arduino Uno over Bluetooth: pair with PIN 1234, wire four jumpers plus two resistors, upload one sketch, and a free terminal app toggles the Uno’s LED. One honest warning before you buy: the HC-05 is Classic Bluetooth, so it works with Android — not iPhone.
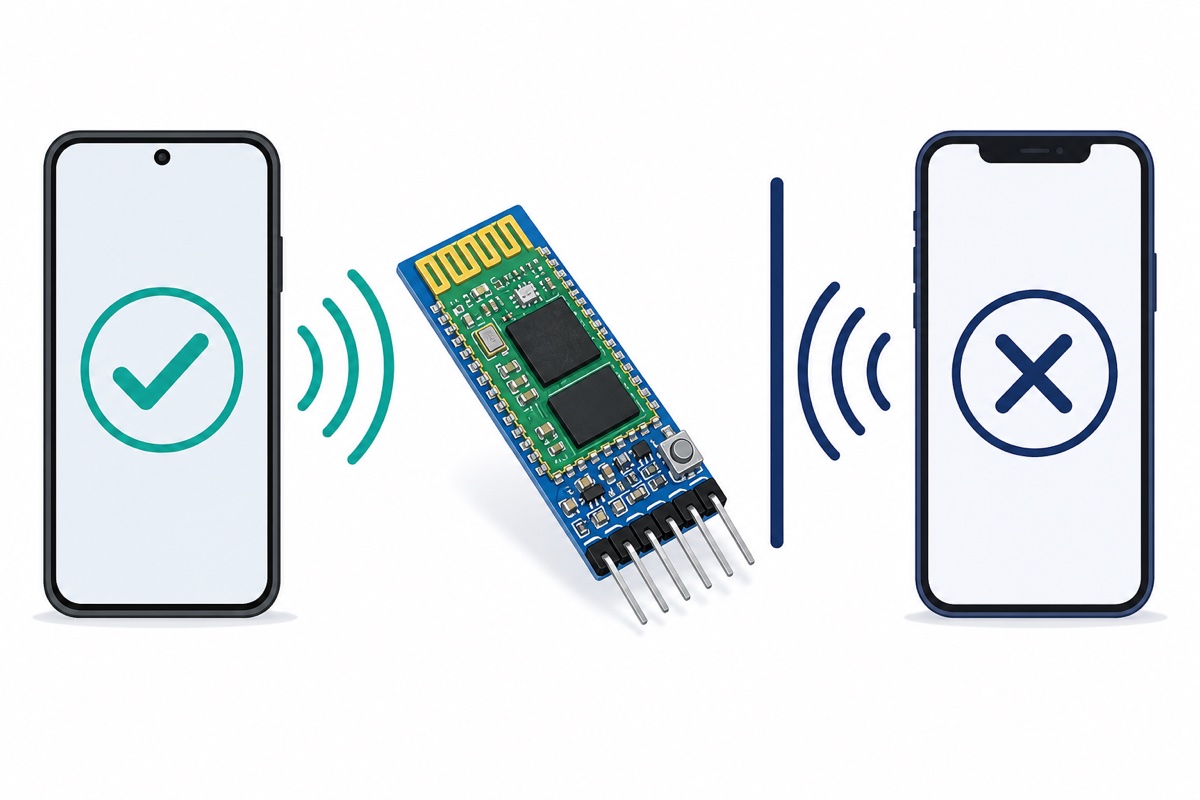
Why does the HC-05 work with Android but not iPhone?
The HC-05 is built around a BC417 radio that speaks Classic Bluetooth 2.0+EDR with the Serial Port Profile (SPP) — it is not a BLE (Bluetooth Low Energy) module. Android supports SPP natively, so Android phones connect without fuss. Apple is a different story: iOS does not support the Serial Port Profile at all — a Bluetooth Classic accessory that streams data to an app must be MFi-certified and use Apple’s own iAP2 accessory protocol, and the HC-05 is neither, so no ordinary iPhone app can open a serial link to it. This is the number one disappointment we see with this module, so we say it up front.
If your project must talk to an iPhone, use a BLE serial module instead — or pick a board with Bluetooth built in. Our ESP32 vs ESP8266 vs Arduino Uno comparison explains why the ESP32’s built-in Bluetooth is the natural upgrade path here.
Parts list
| Item | Price | Qty | |
|---|---|---|---|
 Arduino Uno Compatible SMD UNO R3 with Type B Cable - ATMEGA328P with CH340G-Microcontroller ProjectUNOCH34 Arduino Uno Compatible SMD UNO R3 with Type B Cable - ATMEGA328P with CH340G-Microcontroller ProjectUNOCH34 | RM22.90 | ||
 Wireless Bluetooth Module HC-05 HC-06 Master Slave Bluetooth Module HC05 HC06 - HC-05 BLUETOOTH MODULEHC05BTM Wireless Bluetooth Module HC-05 HC-06 Master Slave Bluetooth Module HC05 HC06 - HC-05 BLUETOOTH MODULEHC05BTM | RM13.95 | Out of stock |
For the voltage divider
| Item | Price | Qty | |
|---|---|---|---|
 400 pcs 1/4W Resistor Pack Resistor Kit 20 Common Value with 20 each400RPAC 400 pcs 1/4W Resistor Pack Resistor Kit 20 Common Value with 20 each400RPAC | RM7.95 | Out of stock |
The divider needs one 1k and one 2k resistor. This 400-piece assortment covers both, plus every other value you will reach for later.
You will also want a breadboard and a few male-female jumper wires to keep the build solder-free, plus two ordinary resistors (1kΩ and 2kΩ) for the voltage divider below.
How do you wire the HC-05 to the Arduino Uno?
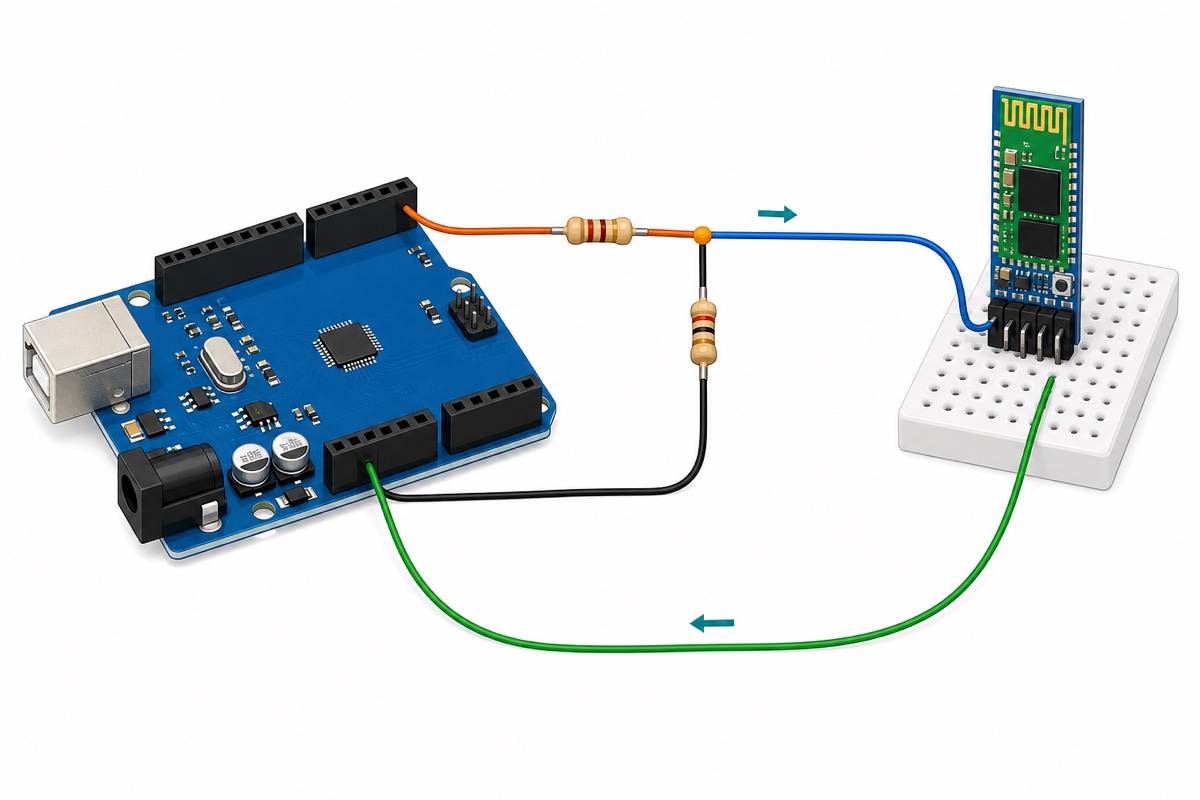
The HC-05 module has six male header pins: STATE, RX, TX, GND, VCC and EN. Power is easy — the board accepts 3.6–6V on VCC because an onboard regulator drops it to 3.3V, so the Uno’s 5V pin is fine. The catch is logic levels: the HC-05’s RX pin is 3.3V logic and is not 5V tolerant, while the Uno transmits at 5V. The fix is a two-resistor voltage divider: Uno D3 → 1kΩ → HC-05 RX, plus 2kΩ from HC-05 RX to GND. That divides 5V × 2000 ÷ (1000 + 2000) = 3.33V — exactly what the pin wants. In the other direction the HC-05’s 3.3V TX signal is high enough for the Uno to read directly, so no divider is needed there. Honesty note: plenty of tutorials skip the divider and the module usually survives for a while — but the pin is not rated for 5V, and the correct fix costs two resistors.
| HC-05 pin | Connects to | Notes |
|---|---|---|
| VCC | Uno 5V | Board accepts 3.6–6V; onboard regulator makes 3.3V. |
| GND | Uno GND | Common ground. |
| TX | Uno D2 | 3.3V signal — the Uno reads it directly. |
| RX | Uno D3 via 1kΩ, plus 2kΩ to GND | Divider drops the Uno’s 5V to 3.3V. |
| STATE | Not connected | Optional: goes HIGH while a phone is connected. |
| EN | Not connected | Leave unconnected — use the onboard button for AT mode instead. |
Everything here sits solder-free on the breadboard. If you later move the circuit to a permanent board, our header pin soldering guide covers the technique.
What Arduino code lets your phone control the LED?
The HC-05 wants its data on pins other than 0 and 1, so the sketch uses SoftwareSerial on pins 2 and 3, leaving the hardware serial port free for uploads and the serial monitor. Most HC-05 clone boards ship in data mode at 9600 baud. Send 1 from the phone to switch the built-in LED on pin 13 on, 0 to switch it off; the Uno echoes the new state back each time.
#include <SoftwareSerial.h>

// HC-05 TX -> Uno D2 (direct), Uno D3 -> 1k/2k divider -> HC-05 RX
SoftwareSerial bt(2, 3);  // RX, TX

const int LED_PIN = 13;   // Uno built-in LED

void setup() {
  pinMode(LED_PIN, OUTPUT);
  Serial.begin(9600);     // USB serial monitor
  bt.begin(9600);         // HC-05 data mode (default on most boards)
  bt.println("HC-05 ready. Send 1 for ON, 0 for OFF.");
}

void loop() {
  if (bt.available()) {
    char c = bt.read();
    if (c == '1') {
      digitalWrite(LED_PIN, HIGH);
      bt.println("LED ON");        // echo status back to the phone
      Serial.println("Phone sent 1 - LED ON");
    } else if (c == '0') {
      digitalWrite(LED_PIN, LOW);
      bt.println("LED OFF");
      Serial.println("Phone sent 0 - LED OFF");
    }
    // any other character (like newline) is ignored
  }
}
Once the LED obeys, the same digitalWrite can drive bigger things — swap pin 13 for a relay signal pin and your phone switches a lamp or a pump. Read our relay module safety guide first, especially the mains-voltage section.
How do you connect your Android phone to the HC-05?
The HC-05 connection is a two-step flow, and skipping step one is the most common reason “the app cannot find it”. First pair in Android itself: Settings → Bluetooth → scan → tap HC-05 → enter PIN 1234 (a few batches use 0000). Pairing only introduces the devices — nothing is connected yet.
Second, connect inside a serial terminal app. We recommend Serial Bluetooth Terminal by Kai Morich from Google Play — it supports Bluetooth Classic SPP, the profile the HC-05 uses. In the app open Devices → Bluetooth Classic, tap HC-05, and once it says connected, type 1 and send — the Uno’s LED lights and “LED ON” comes back in the terminal.
Prefer to watch the whole flow once before building? This walkthrough covers similar wiring, a similar sketch and the app pairing end to end:
How do you enter AT mode to rename or configure the HC-05?
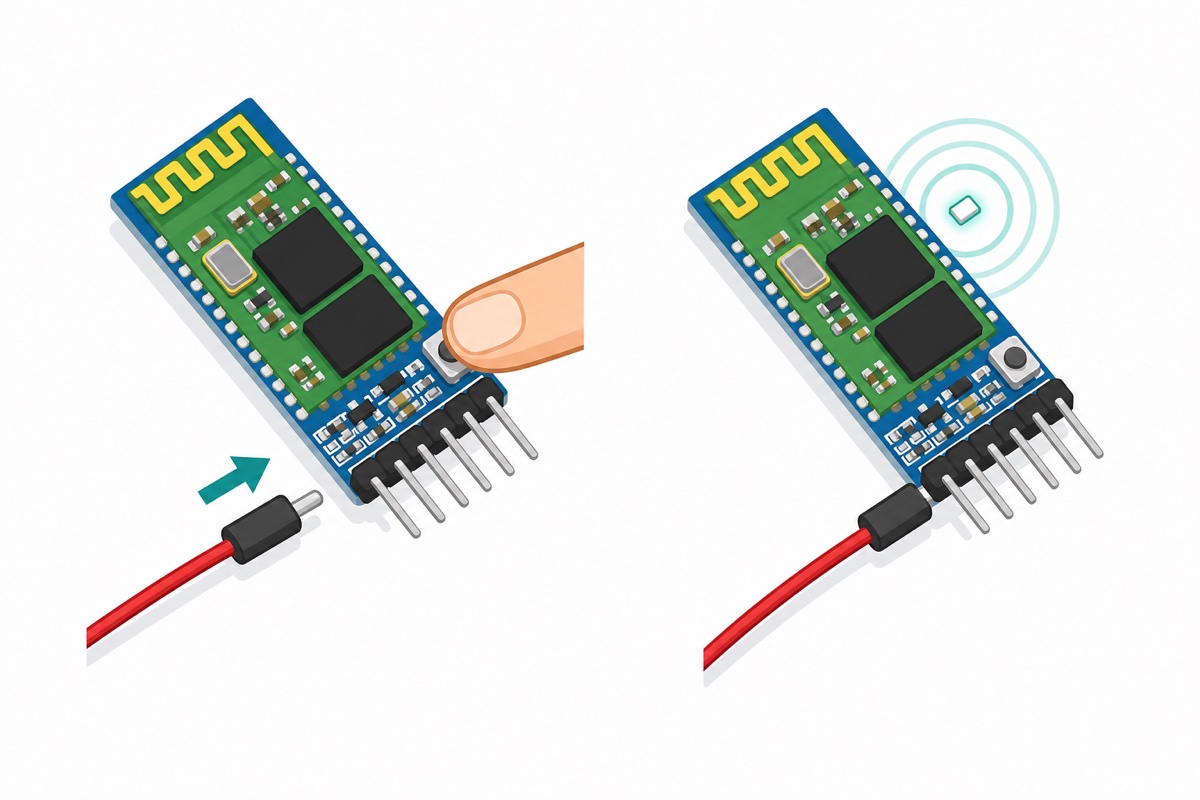
The HC-05’s settings — name, PIN, baud rate — are changed in AT command mode, and this is where most people get stuck. The trick is timing: hold the small onboard button down while you apply power, then release it. The status LED blinks slowly — about once every two seconds — instead of the usual rapid flash — that means AT mode, which runs at a fixed 38400 baud when entered this way, regardless of your data-mode setting.
Upload this bridge sketch (same wiring as above), then power-cycle the HC-05 with the button held:
#include <SoftwareSerial.h>

SoftwareSerial bt(2, 3);  // RX, TX

void setup() {
  Serial.begin(9600);     // serial monitor side
  bt.begin(38400);        // AT mode is always 38400 baud
}

void loop() {
  // pass everything between the serial monitor and the HC-05
  if (bt.available()) Serial.write(bt.read());
  if (Serial.available()) bt.write(Serial.read());
}
Open the serial monitor at 9600 baud and set the line ending to Both NL & CR — the HC-05 ignores commands without the carriage return and newline. Type AT and you should get OK. Useful commands:
| Command | What it does | Example |
|---|---|---|
| AT | Connection test — replies OK | AT |
| AT+NAME= | Renames the module (shows on the next phone scan) | AT+NAME=MyRobot |
| AT+PSWD= | Changes the pairing PIN | AT+PSWD=4321 |
| AT+UART= | Sets data-mode baud, stop bits, parity | AT+UART=9600,0,0 |
Two quirks: on many boards, query commands such as AT+NAME? only answer while the button is held down, and clone firmware differs slightly between versions — if a valid-looking command returns ERROR, hold the button while sending it. Done? Power-cycle without the button and the module returns to data mode.
Common mistakes we see from real customers
The same handful of problems account for nearly every HC-05 support chat we get.
- Buying it for an iPhone project. The HC-05 is Classic Bluetooth SPP and iOS will not connect to it. Android only — for iPhone, go BLE or ESP32.
- Talking to it at the wrong baud. Data mode is 9600 on most boards; AT mode is always 38400. Garbage characters or silence almost always means these two got swapped.
- Wiring TX to TX and RX to RX. Serial lines cross: the module’s TX goes to the Uno pin the sketch reads (D2), and its RX comes from the pin the sketch writes (D3, through the divider).
- Expecting pairing to be the connection. Pairing in Android settings is only step one — nothing works until a terminal app opens the connection to the paired HC-05.
- Sending AT commands without NL & CR. With the serial monitor’s line ending set to “No line ending”, the HC-05 ignores everything and beginners assume the module is dead.
FAQ
Can I use the HC-05 with an iPhone?
No. The HC-05 speaks Classic Bluetooth SPP, and iOS has no app-level support for Classic Bluetooth SPP; Bluetooth Classic data accessories need Apple MFi certification, which the HC-05 does not have. For iPhone projects use a BLE serial module, or a board with built-in Bluetooth such as the ESP32.
Why does my phone pair with the HC-05 but the app cannot connect?
Pairing and connecting are separate steps. After pairing in Android settings, you must open the connection inside a serial terminal app. Also check that no other app is already holding the connection — the HC-05 accepts only one at a time.
Why do I get garbage characters or no OK in AT mode?
Almost always baud rate or line ending. AT mode is fixed at 38400 baud no matter what your data-mode baud is, and the serial monitor must send Both NL & CR. Fix those two settings and AT should answer OK.
What is the difference between the HC-05 and HC-06?
The HC-05 can act as master or slave and has the fuller AT command set; the HC-06 is slave-only with fewer commands. For a phone-controls-Arduino project like this one, both behave the same — the phone is the master either way.
What range can I expect from the HC-05?
It is a Class 2 Bluetooth device, nominally rated around 10 metres in the open. Walls and interference reduce that in practice, so treat it as same-room range, not whole-house range.
Last updated August 2026. Stuck? Chat with us on WhatsApp.
