

Tutorials
Rocker, Toggle or Push Button: Choosing an On/Off Switch for Your Project
Aug
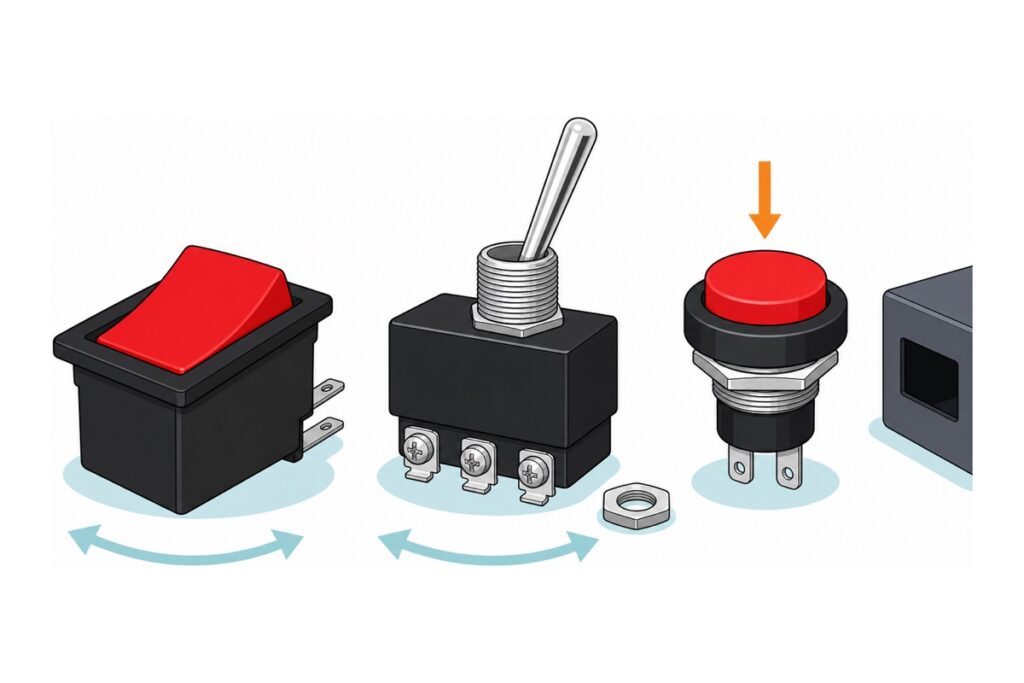
If you want a switch that stays where you left it, buy a rocker or a toggle; a push button only acts while your finger is on it. Put it on the incoming supply line, read the rating moulded on the body, and cut the panel hole smaller than the printed face — that figure is the bezel, not the hole.
Does the switch stay on, or only while you press it?
A rocker switch and a toggle switch stay where you leave them; a push button, in nearly every form on a hobby shelf, does not. A customer asked it better than the vocabulary does — “button ni kalau tekan de kekal ka sbb saya nk buat kipas mini” — does this button stay pressed, I want to make a mini fan. He was holding a tactile button, and the answer is no.
The difference is a spring and where it may rest. Inside a rocker or a toggle, a spring-loaded plunger presses on a rocking contact carrier; push the actuator past the middle and the spring’s line of force crosses over and holds the carrier at the far end. Two stable resting places and nothing in between — that over-centre snap is what you feel and hear. A momentary button has one resting place only: its spring holds the contact open, so pressing overrules the spring and releasing hands the job back. The trade words are latching or maintained for the first behaviour, momentary for the second.
Map it onto the shelf. Stays put: the KCD1-101 rocker (also in black), the E-TEN1121 toggle, the 21 × 15 mm rocker. Acts only while held: the R13-507 panel button — right for a doorbell or a reset pulse, wrong for a fan — and the 6 × 6 mm tactile button. Press-and-it-stays in round-button form arrives another way: the bistable touch switch latches electronically, and the LA38 emergency button locks down when struck and frees on a twist, making it a stop control rather than a power switch.
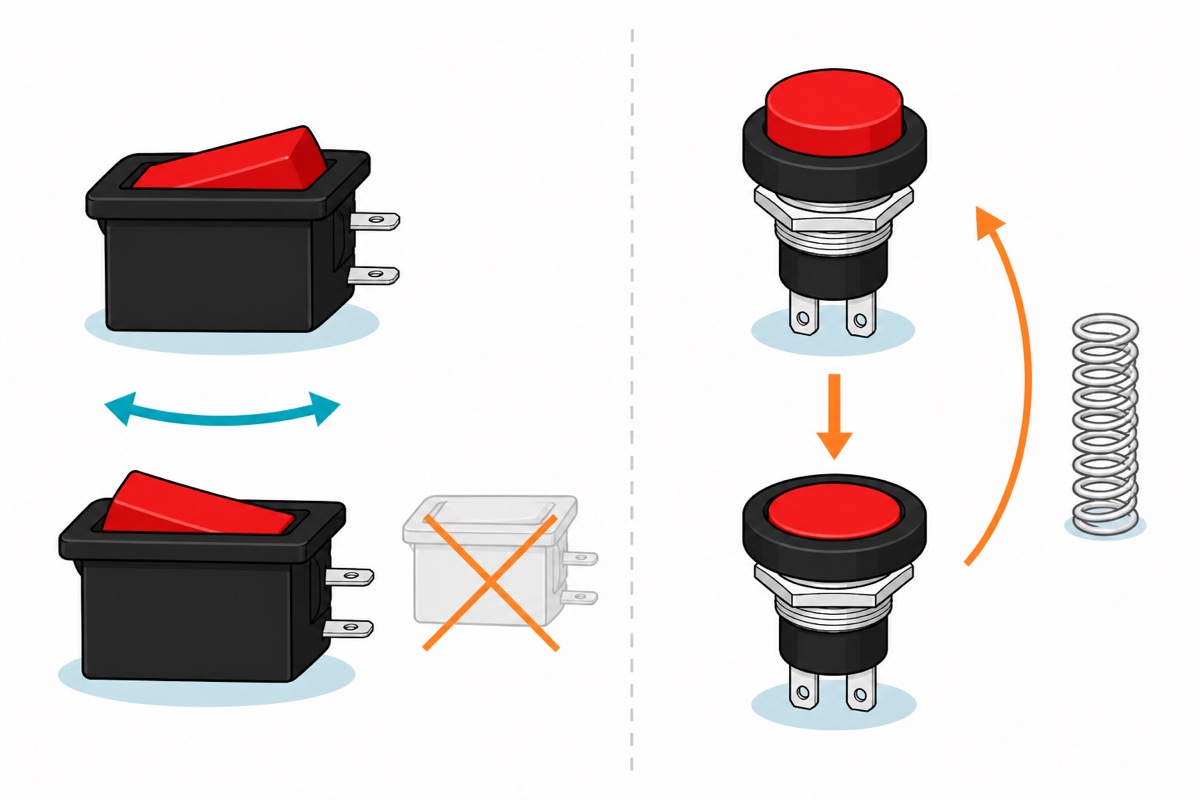
Between the two panel-mount switches that stay put, the choice is mostly the hole you are willing to cut. A rocker switch needs a rectangular cut-out — mark it, drill a pilot, file to the line — and then snaps in with no nut, sits almost flush in the lid and is hard to knock by accident in a bag. A toggle switch asks for one round hole a drill makes in seconds, clamps with hex nuts so panel thickness stops mattering, and takes fork crimps on its screw lugs if you own no soldering iron; the price is a lever standing proud of the box that a sleeve or a shelf edge can flip for you. Rocker for a lid you want clean and knock-proof; toggle for a panel you want cut and wired in five minutes.
Pick ONE of these — they are alternative switches for the same hole, not a kit to buy together
 KCD1-101 Rocker Switch Red Color 2 Pin ON/OFF SPST 6A 250V AC Power Control Switch DIY Electronics Component - KCD1-101 SWITCH(RED)
 E-TEN 1121 Switch Toggle Switch 3 Pin Electronic Component
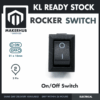 Rocker Switch 2 Pin 21 x 15mm On Off Switch
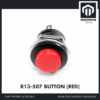 R13-507 Push Button Switch No-Locking Round Momentary Red Green Yellow Blue White Black - R13-507 BUTTON (RED)
Two other things — not project-box power switches, but one of them may be what you actually want
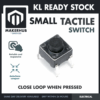 Tactile Button Momentary Switch 6mm x 6mm x 5mm Push Button 4 Pin
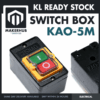 KAO-5M Waterproof Micro Switch IP67 Rated Push Button Switch for DIY Electronics Arduino Robotics Projects
Two parts that are not a project-box power switch, in case one of them is what you are really after. The 6 x 6 x 5 mm tactile button is the breadboard-size lookalike that only acts while pressed, so it belongs on an input pin — our push button guide covers that side. The KAO-5M is a surface-mount start/stop station roughly 90 x 52 x 50 mm with latching green I and red O buttons under a clear flip cover, rated 10 A at 380 V AC with IP54/IP55 sealing: a workshop machine fitting, and anything it switches at mains voltage is a job for a registered wireman.
Why does the switch belong on the supply line, not a signal pin?
A rocker or toggle switch works by being a gap in a wire, so put the gap in the positive lead between the battery or DC adapter and everything else. Open it and there is no complete loop, so nothing downstream draws current — the board is dead and a battery in the box is not quietly draining.
Wire the same switch to a microcontroller input and you have changed what it means. The chip stays powered and keeps drawing current; the pin only reports a state, and code has to read it and decide to stop. That is a good mode button, not an off switch — and it needs a pull-up or pull-down resistor to hold the pin at a known level, which our push button and Arduino guide covers. Switch the source, not the symptom.
So the switch sits in the + wire, supply in on one tab and load out on the other, with no right way round. Solder the tabs rather than twisting, then sleeve each joint — bare tabs a few millimetres from a metal panel is what heat shrink is for.
The mini-fan build that opened this page needs four joints. Battery red lead to one switch tab; the other tab to the fan’s red lead; the two black leads join to each other and never touch the switch. The switch sits in series with the fan, and that is the whole trick — bridge it straight across the battery instead of into the line and you have built a short circuit with a handle on it, which heats the wire rather than running the fan.
Two practical points before the iron comes out. The KCD1-101’s flat tabs are the standard 4.8 mm spade size, so push-on crimps fit if you would rather not solder inside a finished box. And leave the lid enough wire to lift clear and stand aside — a switch soldered in with no slack tethers that lid to the box for the rest of its life.
What do 2 pins, 3 pins and “SPST” actually mean?
Miniature switches are sold by a code rather than a description, so those few letters carry the whole specification. The KCD1-101 rocker is an SPST switch, and its letters are only a count. Pole counts the separate circuits one actuator controls; throw counts the destinations each pole can reach. Single pole, single throw is one circuit with one destination, which needs exactly two terminals: current in, current out.
The E-TEN1121 toggle carries three screw lugs because it is single pole, double throw. Still one circuit, but the centre lug — the common — is always joined to one of the two outer lugs, and the lever moves it between them. Its body is stamped ON at each end for that reason: neither position is off, so it redirects rather than disconnects. That is a “double on” switch.
For plain on/off, wire the common and one outer lug and leave the third empty: one position completes your circuit, the other connects it to nothing, which is electrically open. Settle which outer lug goes with which lever position first, and do not assume it from the lever: the bat pivots about the middle of the switch, so pushing the lever up swings the contact inside it down onto the lower lug. A multimeter ends the argument — continuity range, one probe on the centre lug, one on an outer, flip the lever, and the beep follows it.
| Marking on the part | What it means | Terminals | Example here |
|---|---|---|---|
| SPST, ON-OFF | One circuit, one destination — open or closed | 2 | KCD1-101 rocker, 21 × 15 mm rocker |
| SPDT, ON-ON (“double on”) | One circuit, two destinations — common plus two outers, never open | 3 | E-TEN1121 toggle |
| Momentary, normally open | Closed only while held, spring returns it | 2 | R13-507 panel button |
| Momentary, normally open | Same behaviour; the four pins are two pairs, each pair joined inside | 4 | 6 × 6 mm tactile button |
That last row catches people on a breadboard: a 6 × 6 mm tactile button’s four legs are two pairs, and the pair joined inside is the two legs facing each other across the wider 6.5 mm gap — not the 4.5 mm pair down one side, and not a diagonal, both of which the plunger really does open and close (Omron’s B3F drawing is the footprint every clone copies). Land on the joined pair and pressing appears to do nothing, because that circuit was already closed.
Pole and throw are easier to follow moving than written down:
What size hole do you cut in the box?
The 21 × 15 mm printed on a rocker switch is the bezel, not the hole. That lip sits on top of the panel and hides a rough cut, so a 21 × 15 mm opening lets the switch drop through. The KCD1 body wants a cut-out of about 19 × 13 mm: big enough for the body to pass, small enough for the lip to land on.
Holding it there is a pair of sprung plastic latches on the body sides. Push the switch in, the latches squeeze past the edges of the hole and spring out underneath, clamping the panel between themselves and the bezel lip. That clamp works only across a limited panel thickness: too thin and it rattles, too thick and the latches never clear the far side. The part will tell you its range — set a caliper between the underside of the bezel lip and the shoulder of a latch, and that gap is the panel thickness the switch was built for. On a 3D-printed lid, model the opening at 19 × 13 mm and thin that patch of wall down to the gap you just measured, so the latches have somewhere to spring out into.
Round switches are kinder, because a drill already makes round holes. The R13-507 needs a 16 mm hole and clamps with its chromed hex nut from behind the panel. The E-TEN1121’s bushing is M12, and 12 mm is the thread’s outside diameter, so open the hole a few tenths past nominal or the bushing will not pass. Use a step drill in thin plastic, where a twist drill grabs and cracks it. Cut every hole before anything is soldered, and fit each switch after its wires are on — once a snap-in rocker has latched into a lid, reaching in to squeeze both latches back together usually breaks one.
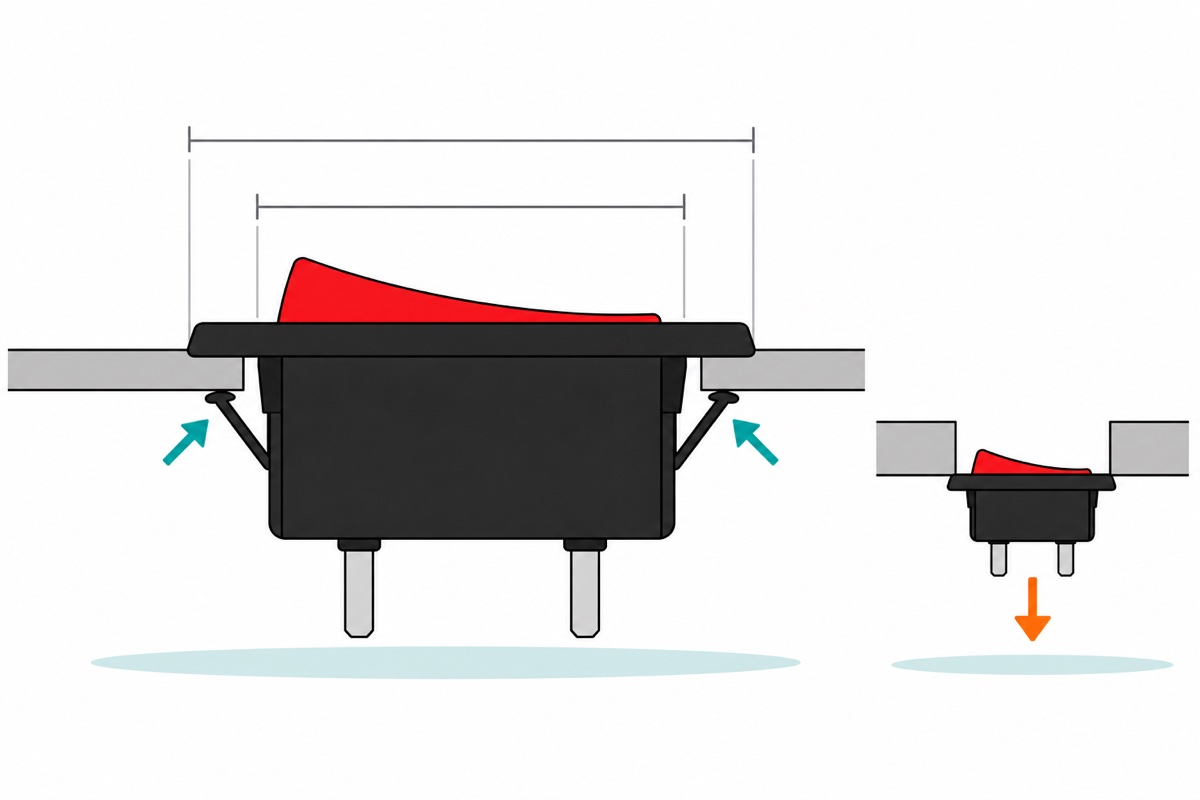
Marking and cutting a clean rectangle in plastic is the part that goes wrong, and it is easier watched than described:
How do you read the rating printed on the body?
The KCD1-101 carries its answer moulded into its housing: 6 A 250 V AC, and 10 A 125 V AC. Two numbers, because two things set the limit. Current is about heat: contacts have a resistance of tens of milliohms, and I² × R means 6 A through the KCD1’s 50 mΩ contact-resistance ceiling dissipates about 1.8 W in a part the size of a fingernail. Voltage is about the arc that jumps as the contacts separate; a higher voltage sustains a longer one, hence 10 A at 125 V but only 6 A at 250 V. The 21 × 15 mm rocker is the same class at 3 A 250 V AC; the E-TEN1121’s body is stamped 15 A 250 V AC.
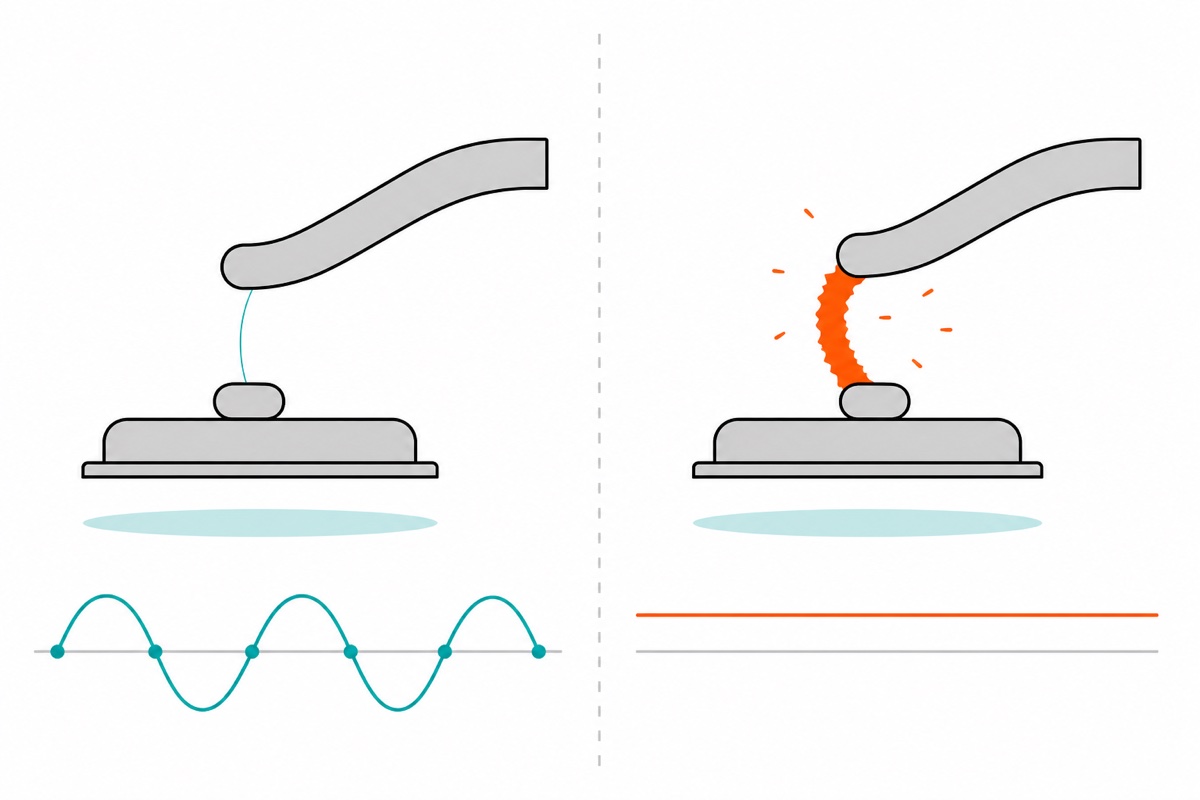
AC ratings flatter a switch asked to do DC. Alternating current falls to zero twice in every cycle — a hundred times a second on Malaysia’s 50 Hz mains — so any arc between opening contacts loses its supply and dies at each crossing. Direct current never crosses zero: an arc once struck keeps burning until the gap stretches far enough to snuff it, which is why AC-rated contacts are de-rated for DC. At project-box voltages that barely bites: 5 or 12 V cannot strike much of an arc, so only the current figure constrains you. A 12 V box with a fan at 0.2 A and a metre of LED strip at 1 A puts 1.2 A through a 6 A contact.
Read the moulded figures before wiring any part in — they sit on the housing or the terminal face. Size for the worst instant, too: a motor or pump pulls several times its running current at switch-on, and that inrush is what welds contacts together. Buy headroom instead of buying to the exact figure — a 6 A contact is comfortable at 1 or 2 A and marginal at 5.
If the load is genuinely bigger than any of these switches, stop hunting for a bigger switch. Let the panel switch carry nothing but the coil of a relay or the gate of a MOSFET, and let that part carry the load: the switch then passes milliamps, and the contacts that meet the inrush belong to a part you can replace without cutting a new hole in the lid.
One thing 250 V AC does not mean. It describes what the contacts survive, not what you are qualified to wire. So no — a 6 A 250 V AC rocker is not the part for cutting into a lamp flex or an extension lead, however neatly it would fit; if you want a switched mains outlet, the answer is a finished certified one bought as a product. Fixed mains wiring in Malaysia is work for a registered wireman, and the line our relay module safety guide draws holds here: stay on the low-voltage DC side of the adapter.
Common mistakes we see from real customers
Buying a spring-return button for an on/off job. A round panel button is the tidiest thing you can put in a lid, and the R13-507 is a good part — but it makes contact only while held. If the fan must keep running after you walk away, the rocker or the toggle is the answer.
“Rocker switch” is a family, not a part. It is how everybody asks — “Bang Roker switch takde”, “Rocker switch takde” — and behind that one phrase sit two-pin and three-pin bodies, several face sizes and a row of colours. Three details pin it down: face size, pin count, colour. “21 × 15 mm, 2 pin, red” reaches exactly one part.
Cutting the hole to the printed size. The figure on the listing is the face you can see; the body that has to pass through the panel is smaller. An opening in a finished lid is far harder to shrink than to enlarge, so cut inside your line and file out until the switch just resists going in — that resistance is the fit the latches want.
FAQ
Does a rocker switch stay on when you let go?
Yes. An over-centre spring gives a rocker two stable resting positions, so it stays wherever you last pushed it. That is what makes it a power switch rather than a button; a bat toggle behaves the same way.
What is the difference between a momentary and a latching switch?
A latching or maintained switch holds its position after you let go; a momentary one is spring-returned and makes contact only while pressed. Rockers and toggles latch; tactile buttons and the R13-507 are momentary.
What size hole do I cut for a 21 × 15 mm rocker switch?
About 19 × 13 mm. The 21 × 15 mm figure is the bezel resting on top of the panel, so the cut-out must be smaller — the lip needs something to sit on and the sprung latches grip the underside.
Does a 2-pin rocker switch have a positive and negative side?
No. An SPST rocker is a gap that opens and closes, so either tab can take the incoming supply and the other feeds the load. Wire it in series in the positive lead, never straight across the supply, which is a short circuit. Polarity only matters if the rocker has a built-in lamp — that is usually what a third terminal on a rocker means, and it is a different thing from the third lug on a toggle.
What does the middle pin on a 3-pin toggle switch do?
It is the common. The lever joins it to one outer lug or the other, so nothing is ever disconnected — it redirects. Wire the common and one outer lug, leave the third empty, and you have plain on/off.
Last updated August 2026. Stuck? Chat with us on WhatsApp.
