

Tutorials
Arduino Digital Clock with DS3231 RTC and LCD1602 I2C
May
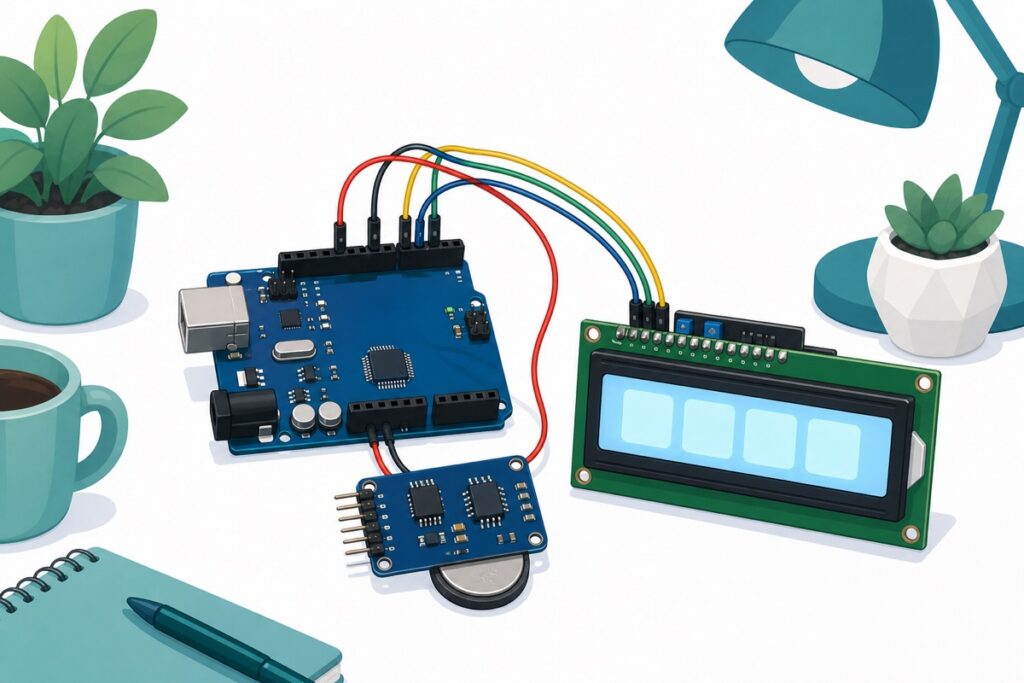
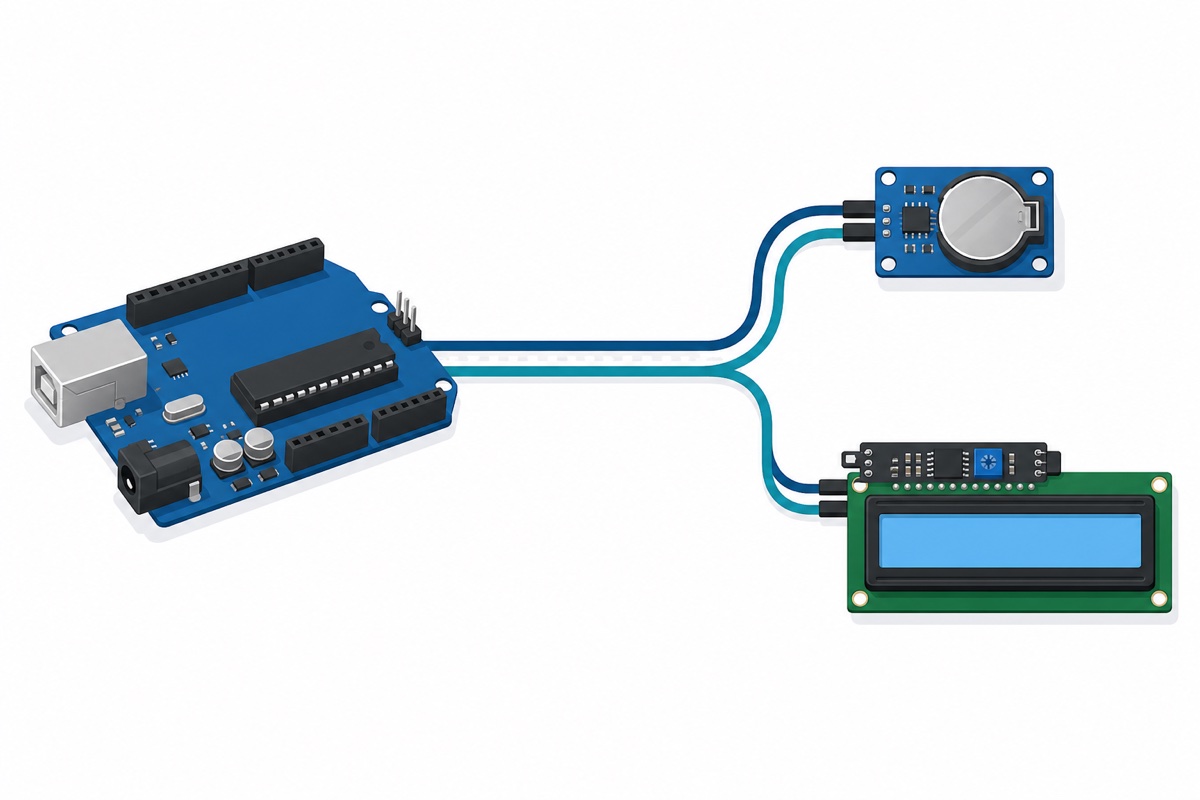
To build an Arduino digital clock, you only need three components: an Arduino Uno, a DS3231 RTC module and an LCD1602 with an I2C backpack. Both modules sit on the same I2C bus — four wires each, with the data lines sharing pins A4 and A5 — and the backup battery on the DS3231 keeps time running even when the power is unplugged.
Why do you need a DS3231 module? Can’t the Arduino keep time on its own?
The DS3231 chip exists because the Arduino Uno genuinely has no idea what time it is. The millis() function only counts how long the board has been powered on, and that count goes back to zero every time the power is cut or the reset button is pressed. Without an RTC (real-time clock), your "clock" starts from zero every time it is plugged back in.
The DS3231 solves that problem with two advantages. First, its TCXO — a temperature-compensated crystal oscillator — gives it an accuracy of ±2ppm across 0°C to +40°C, which works out to roughly ±1 minute per year. Second, the battery holder on the back of the module keeps time ticking even if the Arduino sits unpowered for months. Set the time once, and your clock stays accurate.
Parts list
 Arduino Uno Compatible SMD UNO R3 with Type B Cable - ATMEGA328P with CH340G-Microcontroller Project
 DS3231 Real Time Clock Module RTC I2C Module Compact Size For Arduino IOT
 LCD1602 LCD2004 Liquid Crystal Display Module with IIC I2C Basic 16x2 20x4For Arduino Display Application - 1602 + I2C (Blue)
How do you wire the DS3231 and LCD1602 to an Arduino Uno?
The DS3231 and LCD1602 I2C modules both talk over the I2C bus, so the wiring is very simple: the two modules share the same pins on the Arduino Uno. There is no ten-wire run to the LCD — four pins per module, and that is it.
| Module pin | Arduino Uno pin | Notes |
|---|---|---|
| DS3231 VCC | 5V | The module accepts 3.3V or 5V; with an Uno, use 5V. |
| DS3231 GND | GND | Grounds must be shared. |
| DS3231 SDA | A4 (SDA) | I2C data line. |
| DS3231 SCL | A5 (SCL) | I2C clock line. |
| LCD1602 I2C VCC | 5V | The LCD backpack needs 5V for a clear display. |
| LCD1602 I2C GND | GND | Share the same ground. |
| LCD1602 I2C SDA | A4 (SDA) | Same pin as the DS3231 — that is exactly how it should be. |
| LCD1602 I2C SCL | A5 (SCL) | Same pin as the DS3231. |
Take note of SDA and SCL: both modules connect to the same pins. That is the beauty of I2C — every device has its own address, like houses along the same street. The DS3231 uses address 0x68, while the AT24C32 EEPROM chip riding on the same module sits at 0x57. The LCD backpack is usually at 0x27 (PCF8574 chip) or 0x3F (PCF8574A). Not sure which you have? Upload an I2C scanner sketch — it lists every address present on your bus.
One practical note: some compact DS3231 modules arrive with the header pins not yet fully soldered. Solder those headers before you start — our how to solder header pins guide walks through it step by step. A loose connection on the breadboard is the number one cause of the "RTC tak jumpa" (RTC not found) error.
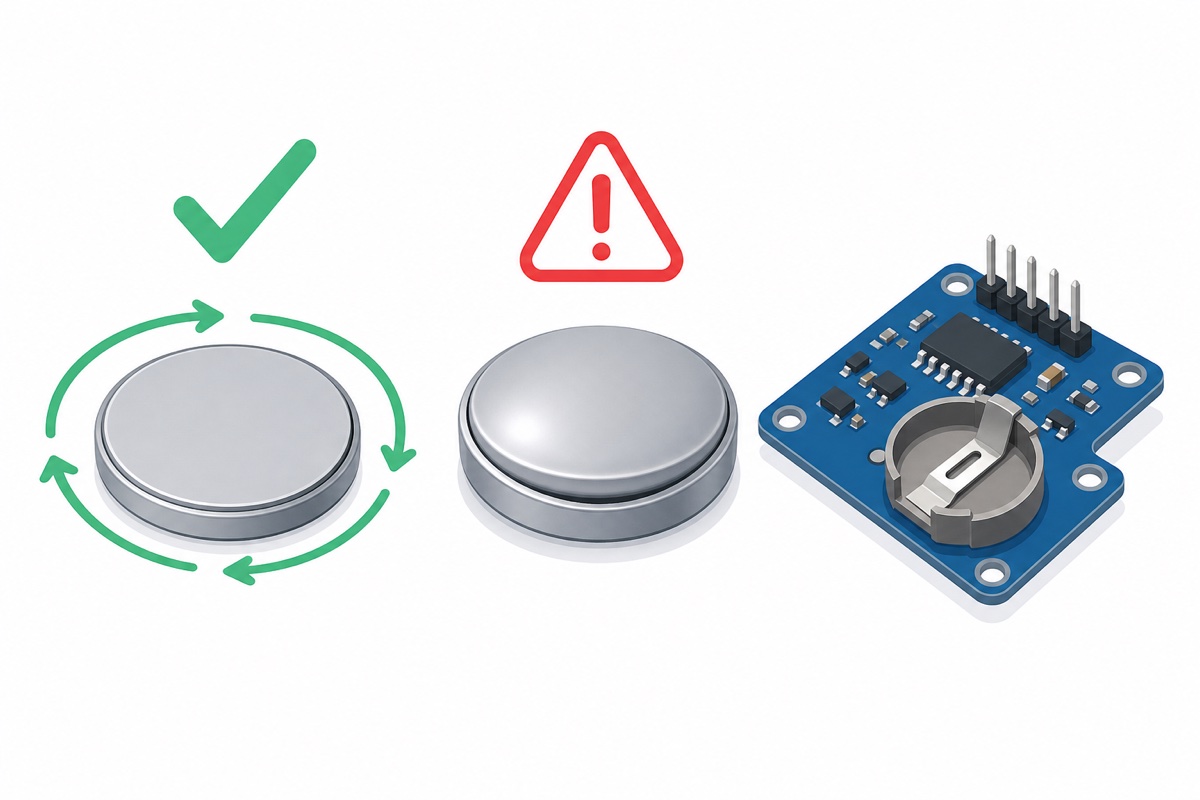
LIR2032 or CR2032 — which battery is safe for the DS3231?
Most compact DS3231 modules include a simple charging circuit — a 1N4148 diode and a 200Ω resistor — designed to top up a LIR2032 (rechargeable) battery whenever the module receives 5V power. This is where many people slip up: a regular CR2032 is not rechargeable, yet it is the same size and fits the same holder perfectly.
If a CR2032 is fitted to a module whose charging circuit is still active, charging current gets forced into a battery that was never designed to accept it. The battery can swell, leak, and in the worst case become a fire risk. The rule is simple:
- The safest route for beginners: use a LIR2032. That is the battery this module was actually designed around, and it recharges automatically whenever your clock is powered on.
- CR2032 only if the charging path is absent or has been disabled. Some modules are sold without the charging diode and resistor. If you are not sure which one you have, just stay with the LIR2032.
- For experienced hands, the charging path can be disabled by removing that diode or the 200Ω resistor — but that is advanced SMD soldering work, not a required step for this project.
What is the full code for this Arduino digital clock?
This DS3231 digital clock needs two libraries from the Arduino IDE Library Manager: RTClib by Adafruit for the RTC, and LiquidCrystal I2C by Frank de Brabander for the display. Go to Sketch → Include Library → Manage Libraries, search for each name, and hit Install.
The most important piece of logic in this sketch is rtc.lostPower(): it is only true when the DS3231 has completely lost power at some point, for example when a fresh battery has just been fitted. Only then does the time get set — to your computer’s time at the moment the sketch was compiled. After that the battery keeps the time, and you are free to upload other sketches without wiping the clock. Make sure the battery is in place before the first upload.
#include <Wire.h>
#include <RTClib.h>
#include <LiquidCrystal_I2C.h>

RTC_DS3231 rtc;
LiquidCrystal_I2C lcd(0x27, 16, 2);  // change to 0x3F if your backpack uses the PCF8574A

// RTClib: dayOfTheWeek() returns 0 = Sunday (Ahad) ... 6 = Saturday (Sabtu)
const char namaHari[7][7] = {"Ahad", "Isnin", "Selasa", "Rabu",
                             "Khamis", "Jumaat", "Sabtu"};

void setup() {
  lcd.init();
  lcd.backlight();

  if (!rtc.begin()) {
    lcd.print("RTC tak jumpa");
    while (true);  // halt here - check the SDA/SCL wiring
  }

  // If the RTC has just powered up for the first time (or the battery was replaced),
  // set the time to the computer's time when this sketch was compiled
  if (rtc.lostPower()) {
    rtc.adjust(DateTime(F(__DATE__), F(__TIME__)));
  }
}

void loop() {
  DateTime now = rtc.now();
  char baris[17];  // the LCD fits 16 characters + null terminator

  // Top row: time in HH:MM:SS format
  snprintf(baris, sizeof(baris), "%02d:%02d:%02d",
           now.hour(), now.minute(), now.second());
  lcd.setCursor(0, 0);
  lcd.print(baris);

  // Bottom row: day + date in DD/MM/YY
  snprintf(baris, sizeof(baris), "%-6s %02d/%02d/%02d",
           namaHari[now.dayOfTheWeek()], now.day(),
           now.month(), now.year() % 100);
  lcd.setCursor(0, 1);
  lcd.print(baris);

  delay(1000);
}
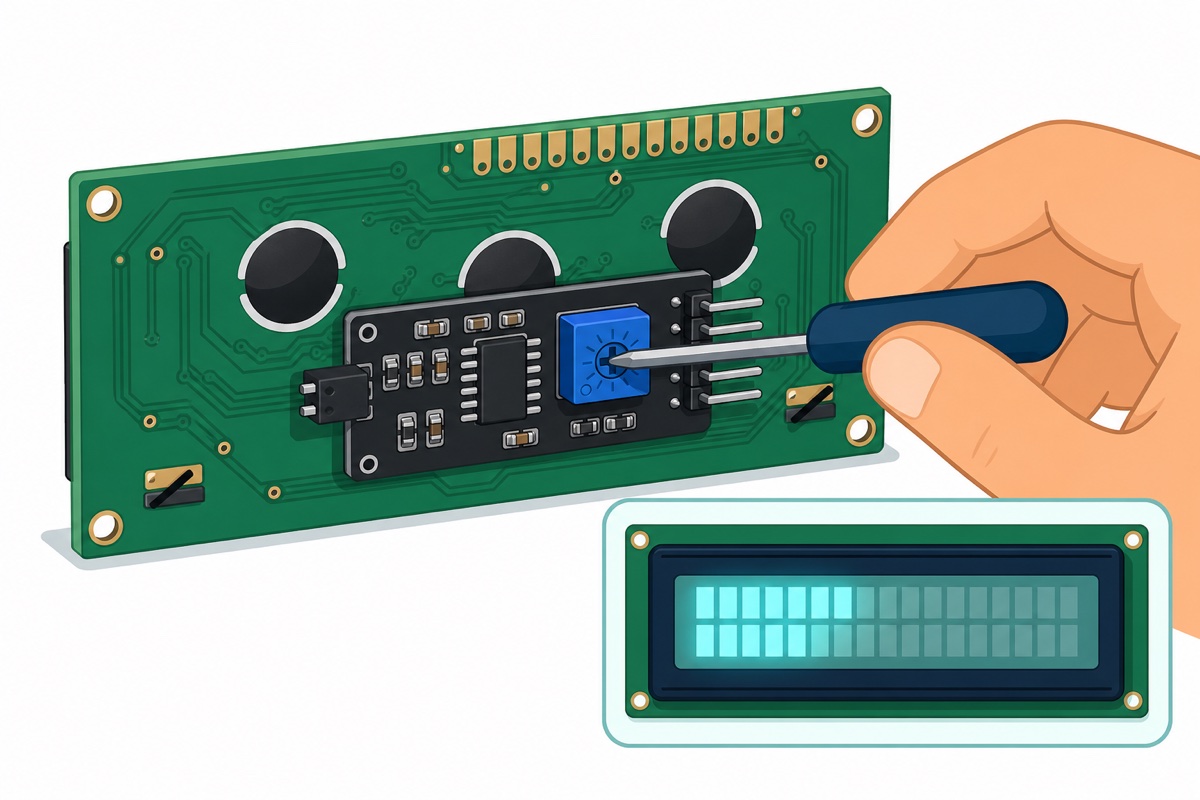
After uploading, the top row of the LCD shows hours, minutes and seconds while the bottom row shows the day and date. The day names print in Malay — swap the strings in the namaHari array for English names if you prefer. If the LCD lights up but stays blank, slowly turn the blue trimmer on the back of the backpack until characters appear — that is the contrast adjustment, not a fault.
This video shows a very similar DS3231 and I2C LCD build, step by step:
Common mistakes we see
The five DS3231 and I2C LCD mistakes below come up again and again among students building clock projects. All of them are easy to avoid.
- Fitting a CR2032 to a module that still has its charging circuit. A few weeks later the battery swells. Use a LIR2032, or confirm the charging path is genuinely absent before using a CR2032.
- The LCD lights up but shows no text. Usually this is just a contrast issue — turn the blue trimmer on the back of the backpack. If it is still blank after that, then check the I2C address.
- The "RTC tak jumpa" (RTC not found) message appears even though the wiring looks right. Usually SDA and SCL are swapped, or the module’s header pins were never soldered and are just resting loose. Check every connection with continuity mode — our how to use a digital multimeter guide shows how.
- The clock jumps back to an old time after every reset. Two causes: the battery is missing or flat, or
rtc.adjust()is called without thelostPower()condition, so the time gets reset to a stale compile time on every restart. - Wrong LCD address in the code. PCF8574 backpacks are usually 0x27, PCF8574A ones 0x3F. If the display refuses to cooperate, run an I2C scanner and match the address in the
LiquidCrystal_I2Cconstructor.
FAQ
Why is my clock a few seconds behind my phone?
Because the F(__DATE__), F(__TIME__) method captures the time at the moment the sketch was compiled, and compiling plus uploading eats a few seconds. After that the DS3231 itself only drifts about one minute per year, so the gap will not grow. If you want tighter seconds, unplug the USB and the battery briefly so lostPower() becomes true again, then compile and upload just as your computer’s clock ticks into a new minute.
How long does the battery on a DS3231 module last?
The battery only works when main power is cut, and in backup mode the DS3231 draws a very small current — which is why one small cell can keep time for years. A LIR2032 also recharges automatically whenever your clock is powered on, so in normal use you will rarely need to replace it.
Can the DS3231 display temperature as well?
Yes. The DS3231 has a built-in temperature sensor — it is part of its TCXO compensation system — and RTClib exposes it through rtc.getTemperature(). Call that function and print the value on the LCD’s second row if you want a clock that doubles as a room thermometer.
Can I use the cheaper DS1307 for this project?
It will work, but the DS1307 relies on an external crystal with no temperature compensation, so its time drifts far faster and the drift changes with ambient temperature. For a clock that will run for months without being reset, the DS3231 with its TCXO is the right choice, and the same RTClib library supports both.
Is this project suitable for RBT or FYP work?
Very much so — the wiring is simple, the result shows up immediately, and it is easy to extend: add a buzzer for an alarm function, display the temperature, or try another Uno project like the automatic clothesline with a rain sensor. For FYP work, the module is also a good foundation for a data logger, since the AT24C32 EEPROM on board can store readings.
Last updated August 2026. Stuck? Chat with us on WhatsApp.
