

Tutorials
SIM800L with Arduino: Send Your First SMS (Wiring + AT Commands)
Nov
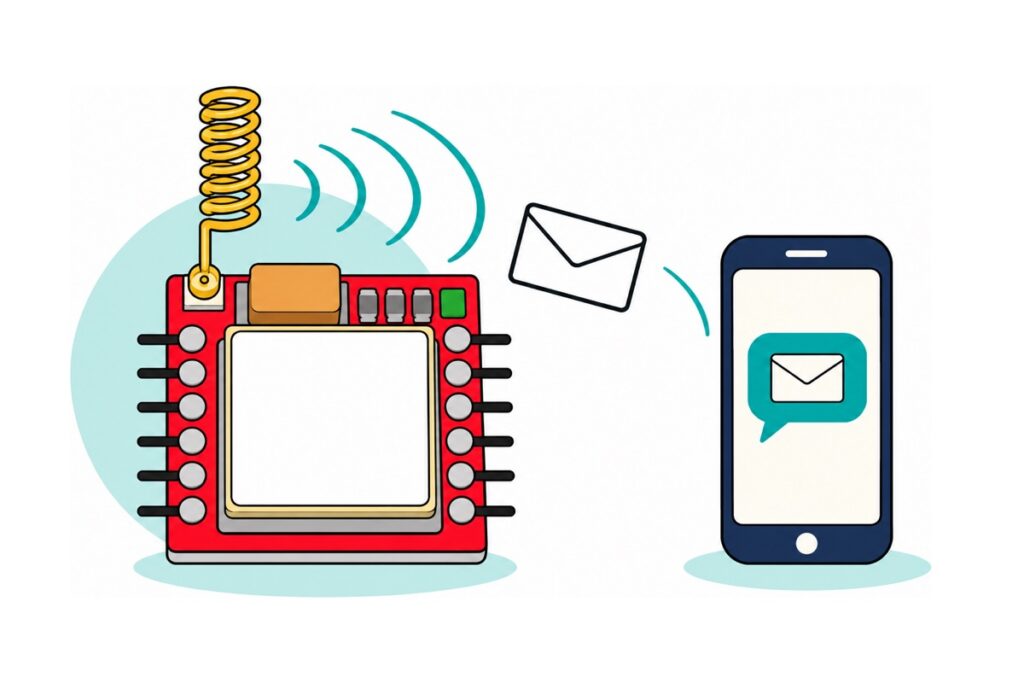
To send your first SMS from a SIM800L GSM module, fit a registered micro-SIM, power the module from a single 18650 cell (it wants 3.4–4.4V and gulps up to 2A), drop the Uno’s 5V TX line to about 2.5V with two 10k resistors, then send AT+CMGF=1 and AT+CMGS="+60…" — the message only leaves when your sketch writes Ctrl+Z, byte 26.
What does the SIM800L need before it can text?
The SIM800L is a 2G-only GSM module, so it needs two things no shop can put in the box: a SIM card and a 2G network. The SIM is a micro-SIM, inserted into the slot on the board’s underside — any registered Malaysian SIM with SMS credit works, prepaid included. Slide it in with its gold contacts toward the board, matching the cut-corner marking beside the slot (a nano-SIM needs a micro adapter). If it has a PIN lock, switch the PIN off in a phone first; a locked SIM leaves the module waiting at +CPIN: SIM PIN. On the network side, 2G is still on air in Malaysia, though a SIM from a 4G-only provider has no 2G network to join and never registers — the FAQ carries the longer answer.
Before wiring: the SIM800L board ships with its two 6-pin header strips loose in the bag, so there are 12 solder joints between you and the breadboard — technique in our header soldering guide, or add the soldering service below and the board arrives ready to plug in.
Parts list: SIM800L first SMS
 SIM800L GSM GPRS Module Quad-Band Network Development Board TTL Port for Arduino Raspberry Pi DIY Projects
 Arduino Uno Compatible SMD UNO R3 with Type B Cable - ATMEGA328P with CH340G-Microcontroller Project
 MB102 Breadboard 170 400 830 Holes Breadboard Donut Board Arduino Prototype Multi Color - BREADBOARD (400 HOLES)
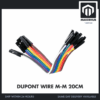 40pcs Dupont Wire 10cm 20cm 30cm for Breadboard DIY Experiment Jumper Wire Breadboard wire - DUPONT WIRE M-M 20CM
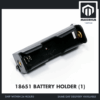 18650 Battery Holder 1/2/3/4 Slot 3.7V Battery Cell Housing Battery Case Battery Casing - 18650 BATTERY HOLDER (1)
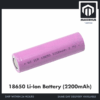 3.7V 18650 Battery Rechargeable Li-Ion Battery 1200mAh 2200mAh 3200mAh Flat Top - 18650 Li-Ion Battery (2200mAh)
 400 pcs 1/4W Resistor Pack Resistor Kit 20 Common Value with 20 each
Optional: motion alert, soldering service and tools
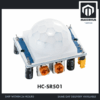 PIR Motion Sensor HC-SR501 MN-SR501 MINI Human Sensor Human Detector Motion Detector Arduino HCSR501 MNSR501 - HC-SR501 PIR MOTION SENSOR
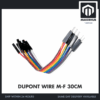 40pcs Dupont Wire 10cm 20cm 30cm for Breadboard DIY Experiment Jumper Wire Breadboard wire - DUPONT WIRE M-F 30CM
 Soldering Service for Circuit Boards & Electronics - 10 Pins Soldering Service
 Soldering Service for Circuit Boards & Electronics - 1 Pin Soldering Service
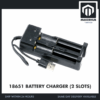 18650 Battery Charger 1/2 Slot Li-on Battery Charger USB A Connector 3.7V Universal Charger - 18651 BATTERY CHARGER (2 SLOT)
 XL830L Digital Multimeter with backlight Portable Multimeter Electronics Project
The PIR sensor and M-F jumpers build the motion alert in the last section. The soldering service (10 pins + 2 single pins = exactly the SIM800L's 12 header pins) ships the module pre-soldered. The charger tops up the 18650 between sessions, and the multimeter makes the divider and battery checks painless.
How do you power and wire the SIM800L to the Uno?
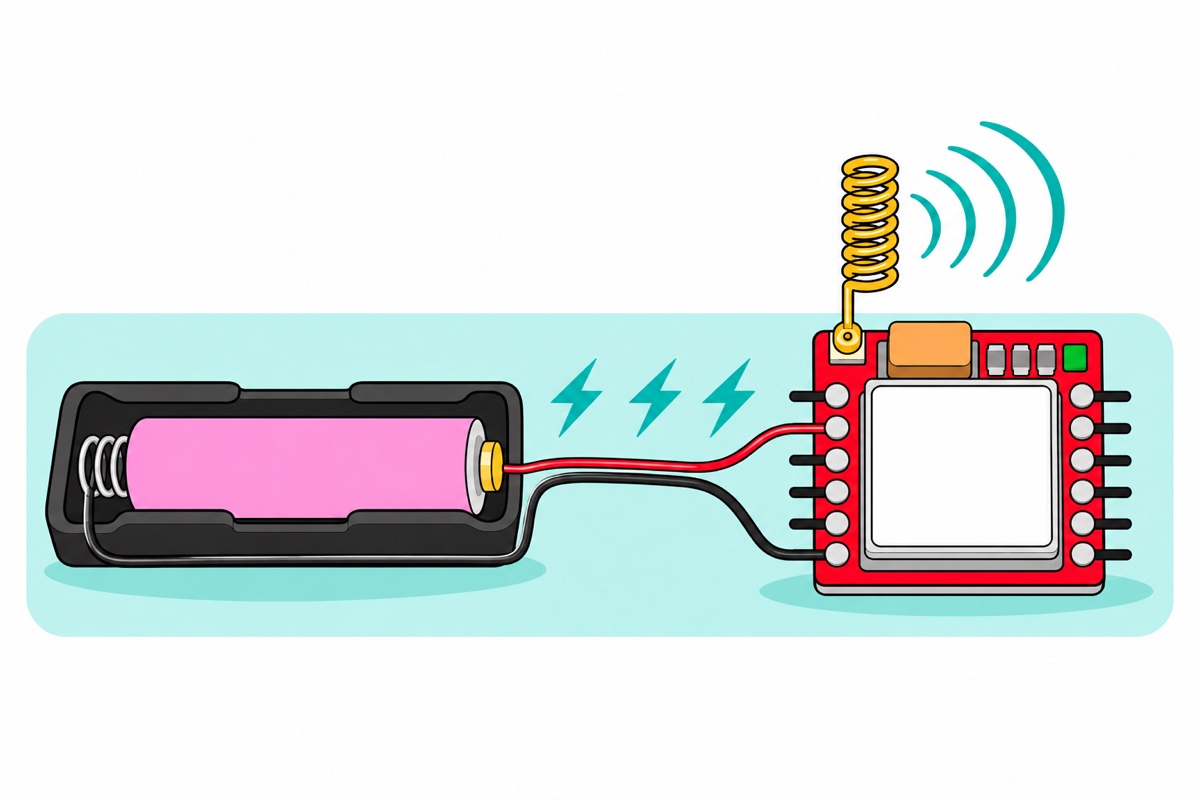
The SIM800L’s supply window is strict — 3.4–4.4V, with transmit bursts up to 2A, per SIMCom’s SIM800 Hardware Design document — and there is no regulator on this little red board: the VCC pin feeds the radio raw. A single Li-ion cell is SIMCom’s own suggested supply — the same document says a 3.7V Li-ion cell can connect to the VBAT pins directly. A charged 18650 sits at 3.7–4.2V through the top half of its charge, inside the window, and delivers 2A bursts without flinching; it is Option 1 in our SIM800L brownout guide, which carries the full power diagnosis (NETLIGHT blink codes, AT+CSQ, AT+CREG?) if your module ever reboots the moment it transmits.
The single-slot holder comes with red and black leads already fitted: twist each bare end tightly around the pin of a male jumper and it plugs into the breadboard like any other wire. Seat the cell minus end to the spring, plus end to the brass button (the red lead’s end): the board has no reverse-polarity protection, so a backwards cell can kill the module. Keep the runs short and direct to the module’s VCC and GND columns — SIMCom budgets under 150mΩ between cell and module because at 2A every 0.1Ω costs 0.2V (V = I × R). Through a full 150mΩ, a fresh 4.2V cell still delivers 3.9V; a half-empty 3.7V cell delivers 3.4V, the window’s very floor. So start each session with a freshly charged cell. Running a 7–12V bench supply instead? An LM2596 buck converter dialled to 4.0V does the same job — the trimmer technique is in our LM2596 guide. Set and measure that 4.0V before the module is connected: an unadjusted buck can pass almost its full input voltage.
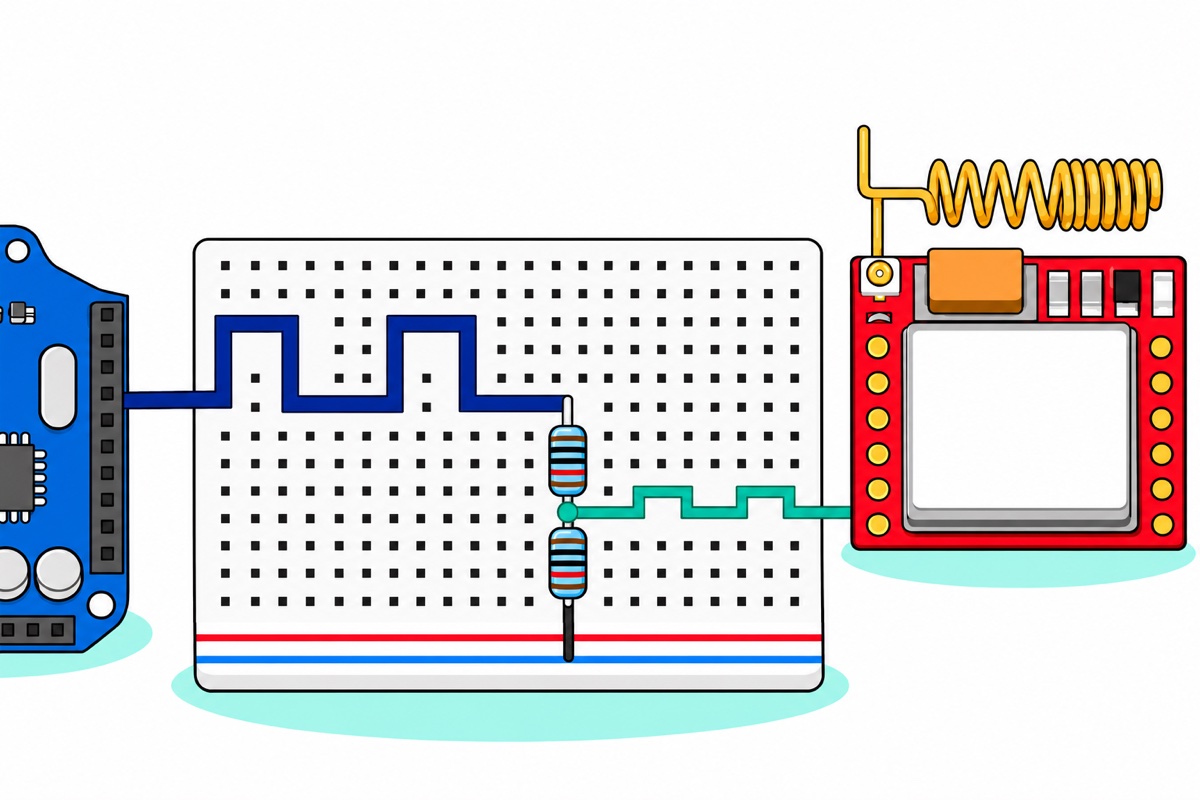
Now the serial side. The SIM800L’s logic pins live on its internal 2.8V rail (VDD_EXT), and the same SIMCom document puts the serial input’s valid HIGH between 2.1V and 3.0V — the Uno’s 5V TX signal would overdrive RXD far past that ceiling: above it, the pin’s protection diode conducts and pushes current into the module’s own 2.8V rail. Two equal resistors fix it: with 10k from the Uno’s D3 to RXD and 10k from RXD to GND, the same current flows through both, so the 5V splits evenly and RXD sees about 2.5V — comfortably inside the window. Both 10k values come off one strip of the resistor pack (on these blue five-band metal-film parts 10k reads brown-black-black-red, then a brown tolerance band; our resistor colour code guide shows which end to start from). Resist the popular 10k/20k recipe: it lands at ~3.3V, just above the 3.0V maximum. The other direction needs no parts. A 2.8V signal cannot push current into a 5V-powered input, so it cannot hurt the Uno; and although it sits a whisker under the 3.0V (0.6 × 5V) that the ATmega328P guarantees to read as HIGH, real chips switch lower and read the module’s TX reliably in practice. TXD wires straight to D2, the same wiring as the brownout guide, pin for pin.
| SIM800L pin | Connects to | Notes |
|---|---|---|
| VCC | 18650 holder red lead | Never the Uno’s 5V pin: 5V exceeds the 4.5V absolute maximum, and the Uno cannot supply 2A bursts |
| GND | 18650 holder black lead AND Uno GND | Common ground is mandatory: both boards measure HIGH and LOW from it |
| TXD | Uno D2 | Direct wire — 2.8V reads as HIGH in practice |
| RXD | Uno D3 via divider | 10k from D3 to RXD, 10k from RXD to GND (≈2.5V) |
| Antenna | Gold coil antenna, solder leg in the NET pad | Never transmit without an antenna fitted |
| RST | Leave unconnected | Not needed for basic use |
| RING, DTR, MIC±, SPK± | Leave unconnected | Call, audio and sleep pins, not needed for SMS |
Solder the gold antenna coil’s bent leg to the NET pad (top-left, beside the tiny antenna socket) in the same session as the headers, before the board goes near the breadboard. Then build on the breadboard in this order: module first, divider resistors beside RXD, signal jumpers to the Uno, battery last. The coil is not decoration — transmitting without an antenna reflects the transmit power back into the module. Everything here is low-voltage DC, but the 18650 is an unprotected cell: never let the holder’s bare lead ends touch, and charge it only in a proper 18650 charger — habits in our 18650 charging guide.
How do you talk to the SIM800L with AT commands?
AT commands are the SIM800L’s entire user interface: every line your sketch prints to it is a command, every line that comes back is its answer. This sketch runs the three checks that matter for SMS, then turns your Serial Monitor into a live terminal to the module — set it to 9600 baud with line ending “Both NL & CR”, because the module only acts on a command once the carriage return arrives.
#include <SoftwareSerial.h>

// SIM800L TXD -> Uno D2 (direct wire)
// SIM800L RXD <- Uno D3 through the 10k/10k divider
SoftwareSerial sim800(2, 3);  // RX, TX

// print each reply as it arrives: SoftwareSerial holds only 64 bytes
void waitAndEcho(unsigned long ms) {
  unsigned long start = millis();
  while (millis() - start < ms) {
    if (sim800.available()) Serial.write(sim800.read());
  }
}

void setup() {
  Serial.begin(9600);
  sim800.begin(9600);
  delay(3000);                 // let the module boot

  sim800.println("AT");        // expect: OK
  waitAndEcho(500);
  sim800.println("AT+CPIN?");  // expect: +CPIN: READY (SIM accepted)
  waitAndEcho(500);
  sim800.println("AT+CREG?");  // expect: +CREG: 0,1 or 0,5 (registered)
  waitAndEcho(500);
  sim800.println("AT+CMGF=1"); // text mode: plain characters, not PDU
  waitAndEcho(500);
}

void loop() {
  // passthrough: type AT commands in the Serial Monitor
  // (9600 baud, line ending "Both NL & CR")
  if (sim800.available()) Serial.write(sim800.read());
  if (Serial.available()) sim800.write(Serial.read());
}
On the first run, give the module time: once the battery is in, wait for NETLIGHT to slow from one blink a second (searching) to one every three seconds (registered), then open the Serial Monitor. Opening it resets the Uno, so the checks run again against a ready module. Each reply follows an echo of its command, which is normal.
| Command | Good reply | Anything else means |
|---|---|---|
AT |
OK |
Silence: TXD and RXD swapped, divider miswired, no common GND, or no power |
AT+CPIN? |
+CPIN: READY |
+CPIN: SIM PIN: PIN lock still on. ERROR: SIM not detected, reseat it |
AT+CREG? |
+CREG: 0,1 (home) or 0,5 (roaming) |
0,2: still searching, wait. 0,3: the network refused the SIM |
The last command, AT+CMGF, decides what language you and the module speak. In PDU mode (AT+CMGF=0) the module expects the whole SMS pre-packed as the binary packet the network actually carries — number, encoding and body squeezed into hex digits. In text mode (AT+CMGF=1) the module builds that packet for you from plain characters. The setting is not permanently stored by default, so the sketches here set it fresh in setup() every boot — then you can forget PDU exists. Command details beyond this page live in SIMCom’s SIM800 AT Command Manual.
Why does AT+CMGS send nothing until Ctrl+Z?
The AT+CMGS command is a two-act dialogue. Act one: you send AT+CMGS="+60123456789" and a carriage return. The module answers with a lone > — the prompt. From that moment it stops treating your bytes as commands and starts collecting them as the message body.
Act two is the trap: the module keeps collecting forever until it receives one specific byte — 0x1A, decimal 26, the character Ctrl+Z — which means “message complete, hand it to the network”. (Byte 27, ESC, is its opposite: throw the draft away.) Why not simply Enter? Because a text may contain line breaks: under the 3GPP TS 27.005 SMS standard, a carriage return typed after the prompt becomes part of the message and earns a fresh >. Only bytes that can never belong to a message can end it, so Ctrl+Z sends and ESC cancels. That is also why the body goes out with print(), not println(), which would add a line break instead of ending anything. The Arduino Serial Monitor can only send printable text, so you cannot type Ctrl+Z into it — which is why half the internet’s “CMGS never sends” threads end at this exact line. The sketch sends the byte itself: sim800.write(26);. A few seconds later the module reports +CMGS: 1 (a message reference number) and OK — the network has it. One plain SMS carries up to 160 characters of the GSM alphabet, which covers English and Malay text; Chinese characters and emoji need UCS2 encoding, a step beyond a first SMS.
#include <SoftwareSerial.h>

SoftwareSerial sim800(2, 3);  // RX, TX

// print each reply as it arrives: SoftwareSerial holds only 64 bytes
void waitAndEcho(unsigned long ms) {
  unsigned long start = millis();
  while (millis() - start < ms) {
    if (sim800.available()) Serial.write(sim800.read());
  }
}

void sendSMS(const char *number, const char *text) {
  sim800.println("AT+CMGF=1");   // text mode, set fresh every boot
  waitAndEcho(500);
  sim800.print("AT+CMGS=\"");    // quotes are part of the command
  sim800.print(number);
  sim800.println("\"");
  waitAndEcho(500);              // module answers with the > prompt
  sim800.print(text);            // message body - no println here
  sim800.write(26);              // Ctrl+Z (byte 26): hand it to the network
  waitAndEcho(5000);             // sending takes a few seconds
}

void setup() {
  Serial.begin(9600);
  sim800.begin(9600);
  delay(8000);                   // boot + network registration

  // your own number, international format
  sendSMS("+60123456789", "Hello from my Arduino");
  Serial.println("Done - a +CMGS: line above means the network took it");
}

void loop() {
  // echo the module's replies: +CMGS: 1 then OK means delivered to network
  if (sim800.available()) Serial.write(sim800.read());
}
Change the number to your own phone in international format (+60…) and upload once NETLIGHT is on its slow three-second blink. Uploading resets only the Uno, so the battery-powered module stays registered, and your phone buzzing is the payoff. Open the Serial Monitor to watch the whole dialogue (the > prompt, your text, then +CMGS: and OK), but know that opening it resets the Uno and re-runs setup(), so that view costs a second, billed text.
How do you read an SMS reply on the SIM800L?
Receiving on the SIM800L is the mirror image of sending. Text the module back from your phone and it announces the arrival unprompted: +CMTI: "SM",1 — “new message, stored at index 1”. In the passthrough sketch, type AT+CMGR=1 to print the sender, timestamp and body; AT+CMGD=1 deletes it afterwards — SIM storage holds only a few dozen messages. Prefer a live feed? AT+CNMI=2,2,0,0,0 pushes each new SMS straight out of the serial port as a +CMT: line, body included, storing nothing — the pattern a sketch would parse to act on texted commands.
How do you turn the SIM800L into a motion alert that texts you?
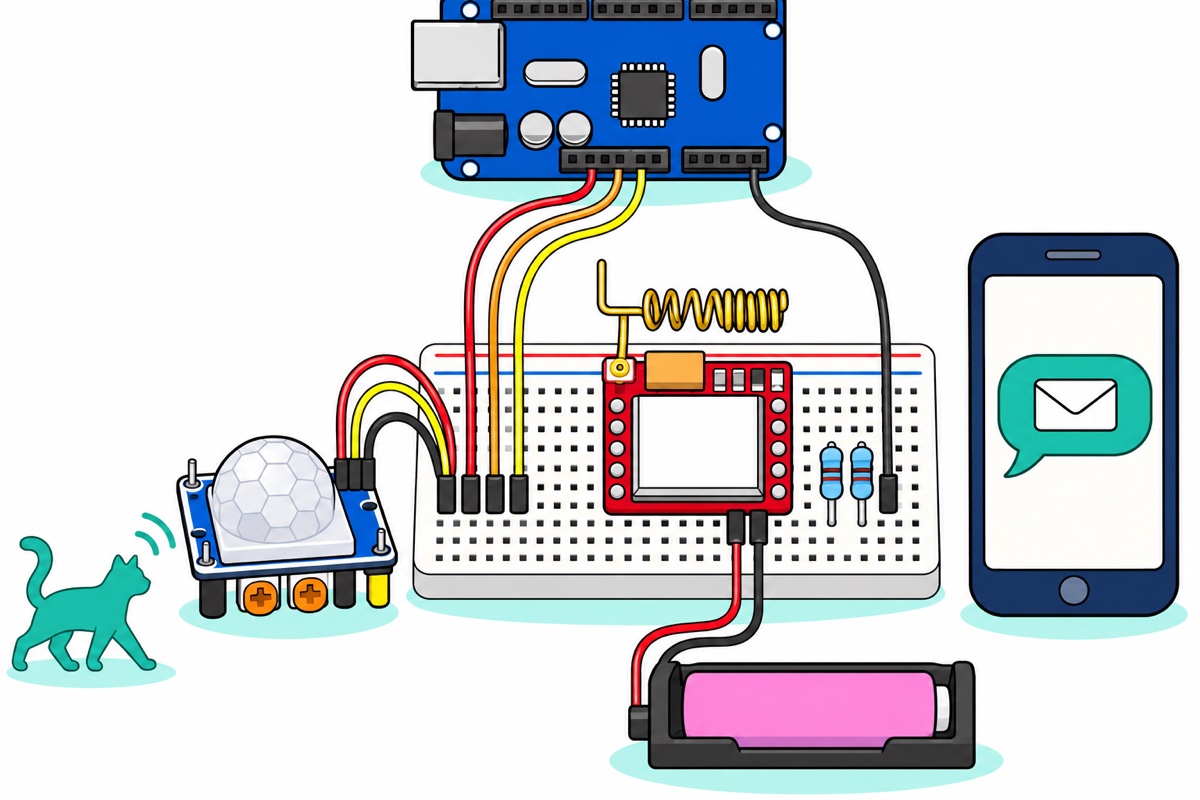
The HC-SR501 PIR sensor makes the classic payoff build: something moves, your phone buzzes. The HC-SR501 accepts 5–20V, so the Uno’s 5V pin feeds it, and its OUT pin speaks 3.3V logic, above the 3.0V an Uno guarantees to read as HIGH — no divider on this side, since the signal travels into the Uno, not into a 2.8V-rail pin. Wire VCC → 5V, GND → GND, OUT → D7 with M-F jumpers (the sensor’s header is male pins). Sensitivity, range and the two orange trimmers are covered in our PIR motion light guide — read it before you trust this alert.
One rule, because it costs real money: a PIR with no rate limit will drain your prepaid in an afternoon. The HC-SR501 retriggers for as long as it sees movement, and without a limit the loop would re-send every six seconds or so, the length of one sendSMS() call: hundreds of billed texts an hour. The sketch below sends one, then ignores the sensor for five minutes, capping the worst case at 12 an hour (raise LOCKOUT_MS for a busy room); it also waits a minute at power-on, because the HC-SR501 can fire a few false triggers for about a minute while it settles.
#include <SoftwareSerial.h>

SoftwareSerial sim800(2, 3);  // RX, TX

const int PIR_PIN = 7;        // HC-SR501 OUT: 3.3V logic, Uno reads it directly
const unsigned long LOCKOUT_MS = 300000UL;  // 5 min between SMS - protects your credit

unsigned long lastSMS = 0;
bool sentBefore = false;

// print each reply as it arrives: SoftwareSerial holds only 64 bytes
void waitAndEcho(unsigned long ms) {
  unsigned long start = millis();
  while (millis() - start < ms) {
    if (sim800.available()) Serial.write(sim800.read());
  }
}

void sendSMS(const char *number, const char *text) {
  sim800.println("AT+CMGF=1");
  waitAndEcho(500);
  sim800.print("AT+CMGS=\"");
  sim800.print(number);
  sim800.println("\"");
  waitAndEcho(500);
  sim800.print(text);
  sim800.write(26);            // Ctrl+Z sends it
  waitAndEcho(5000);
}

void setup() {
  pinMode(PIR_PIN, INPUT);
  Serial.begin(9600);
  sim800.begin(9600);
  delay(8000);                 // module boot + registration
  delay(60000);                // HC-SR501 warm-up: false triggers for ~1 min
  Serial.println("Armed");
}

void loop() {
  bool lockedOut = sentBefore && (millis() - lastSMS < LOCKOUT_MS);

  if (digitalRead(PIR_PIN) == HIGH && !lockedOut) {
    Serial.println("Motion - sending SMS");
    sendSMS("+60123456789", "Motion detected at home");
    lastSMS = millis();
    sentBefore = true;
  }

  if (sim800.available()) Serial.write(sim800.read());
}
Left on guard, the Uno and PIR run on USB (a phone charger once the laptop goes) and the SIM800L on its cell. Idling on the network, the module draws about 22mA by SIMCom’s figures, so a 2200mAh cell lasts about 100 hours at best. At 3.49V it reports UNDER-VOLTAGE WARNNING (SIMCom’s spelling), and below 3.39V it switches itself off: recharge, or move a permanent install to the LM2596 on a wall adapter.
Be honest about what this is: a hobby alert that tells you something moved. It does not replace an alarm system — anything protecting real valuables deserves proper security equipment.
Common mistakes we see
The > prompt appears, then nothing ever sends. The module is still waiting for byte 26. Typing “26” or pressing Enter does not produce it — only sim800.write(26); in the sketch does.
ERROR straight after AT+CMGS. Usually text mode was never set this boot — AT+CMGF=1 belongs in setup(), not in your memory — or the phone number was sent without its quotation marks.
A local-format number that never arrives. Write the destination in international format, +60123456789 — local habits like 0123456789 may work on one network and silently vanish on another.
FAQ
Does the SIM800L still work on Malaysian networks?
Yes — the SIM800L is 2G-only, and 2G remains on air in Malaysia: the major operators keep it running for voice fallback and machine-to-machine devices, and none has announced a shutdown date. Plans can change, so for a device meant to run for years, confirm 2G support with your carrier before committing.
Can I use my normal 4G or 5G prepaid SIM in a SIM800L?
Usually yes. A modern SIM card is network-agnostic plastic — what matters is that the network behind it still accepts 2G connections, and Malaysia’s major networks do; a SIM from a 4G-only provider has no 2G network to join and never registers. The SIM must be registered, micro-SIM sized, with SMS credit and its PIN lock disabled.
Why does my SIM800L restart when it sends an SMS?
Transmitting is when the module pulls its 2A bursts, so a weak supply collapses at exactly that moment and the module brown-out resets. Feed it a charged 18650 or a buck set to 4.0V on short thick leads, never the Arduino’s 5V pin — the full diagnosis lives in our SIM800L power guide.
Do I have to solder the SIM800L’s header pins?
Yes — the board ships with its two 6-pin header strips loose, and breadboard use needs all 12 pins soldered. It is a friendly first soldering job (technique in our header soldering guide), or add the 12-pin soldering service and the board arrives ready to plug in.
Why is my SIM800L not responding to AT commands?
Check, in order: power (NETLIGHT blinking), TXD to D2 and RXD through the divider to D3 rather than swapped, a shared GND, and the Serial Monitor at 9600 baud with “Both NL & CR”. The SIM800L’s factory auto-baud locks onto the speed of the first AT it hears after power-up, so if that one gets nothing, send AT again.
Last updated November 2026. Stuck? Chat with us on WhatsApp.
